
Getting Started with Pulsify
Everything you need to go from sign-up to processing your first invoice. Takes less than an hour.
Connect Your Accounting Software
Pulsify connects to Xero and MYOB via OAuth - the same secure authorisation flow used by banks. From your Pulsify dashboard, go to Settings → Connections and click "Connect Xero" or "Connect MYOB". You'll be redirected to your accounting software to grant access. The whole process takes about two minutes.
Once connected, Pulsify pulls your chart of accounts, supplier list, and existing contacts. These are used to power coding suggestions and route invoices to the right accounts from day one - no manual setup of account codes required.
Pulsify requests read/write access to bills only. It does not connect to your bank accounts or payment initiation. All access can be revoked at any time from within your accounting software.
Tip - multiple entities
If you manage more than one business entity, add them from Settings → Manage Companies → Create Company. Each entity gets its own connection and its own approval rules. Multi-entity management is available on the Scale plan.
Add Users
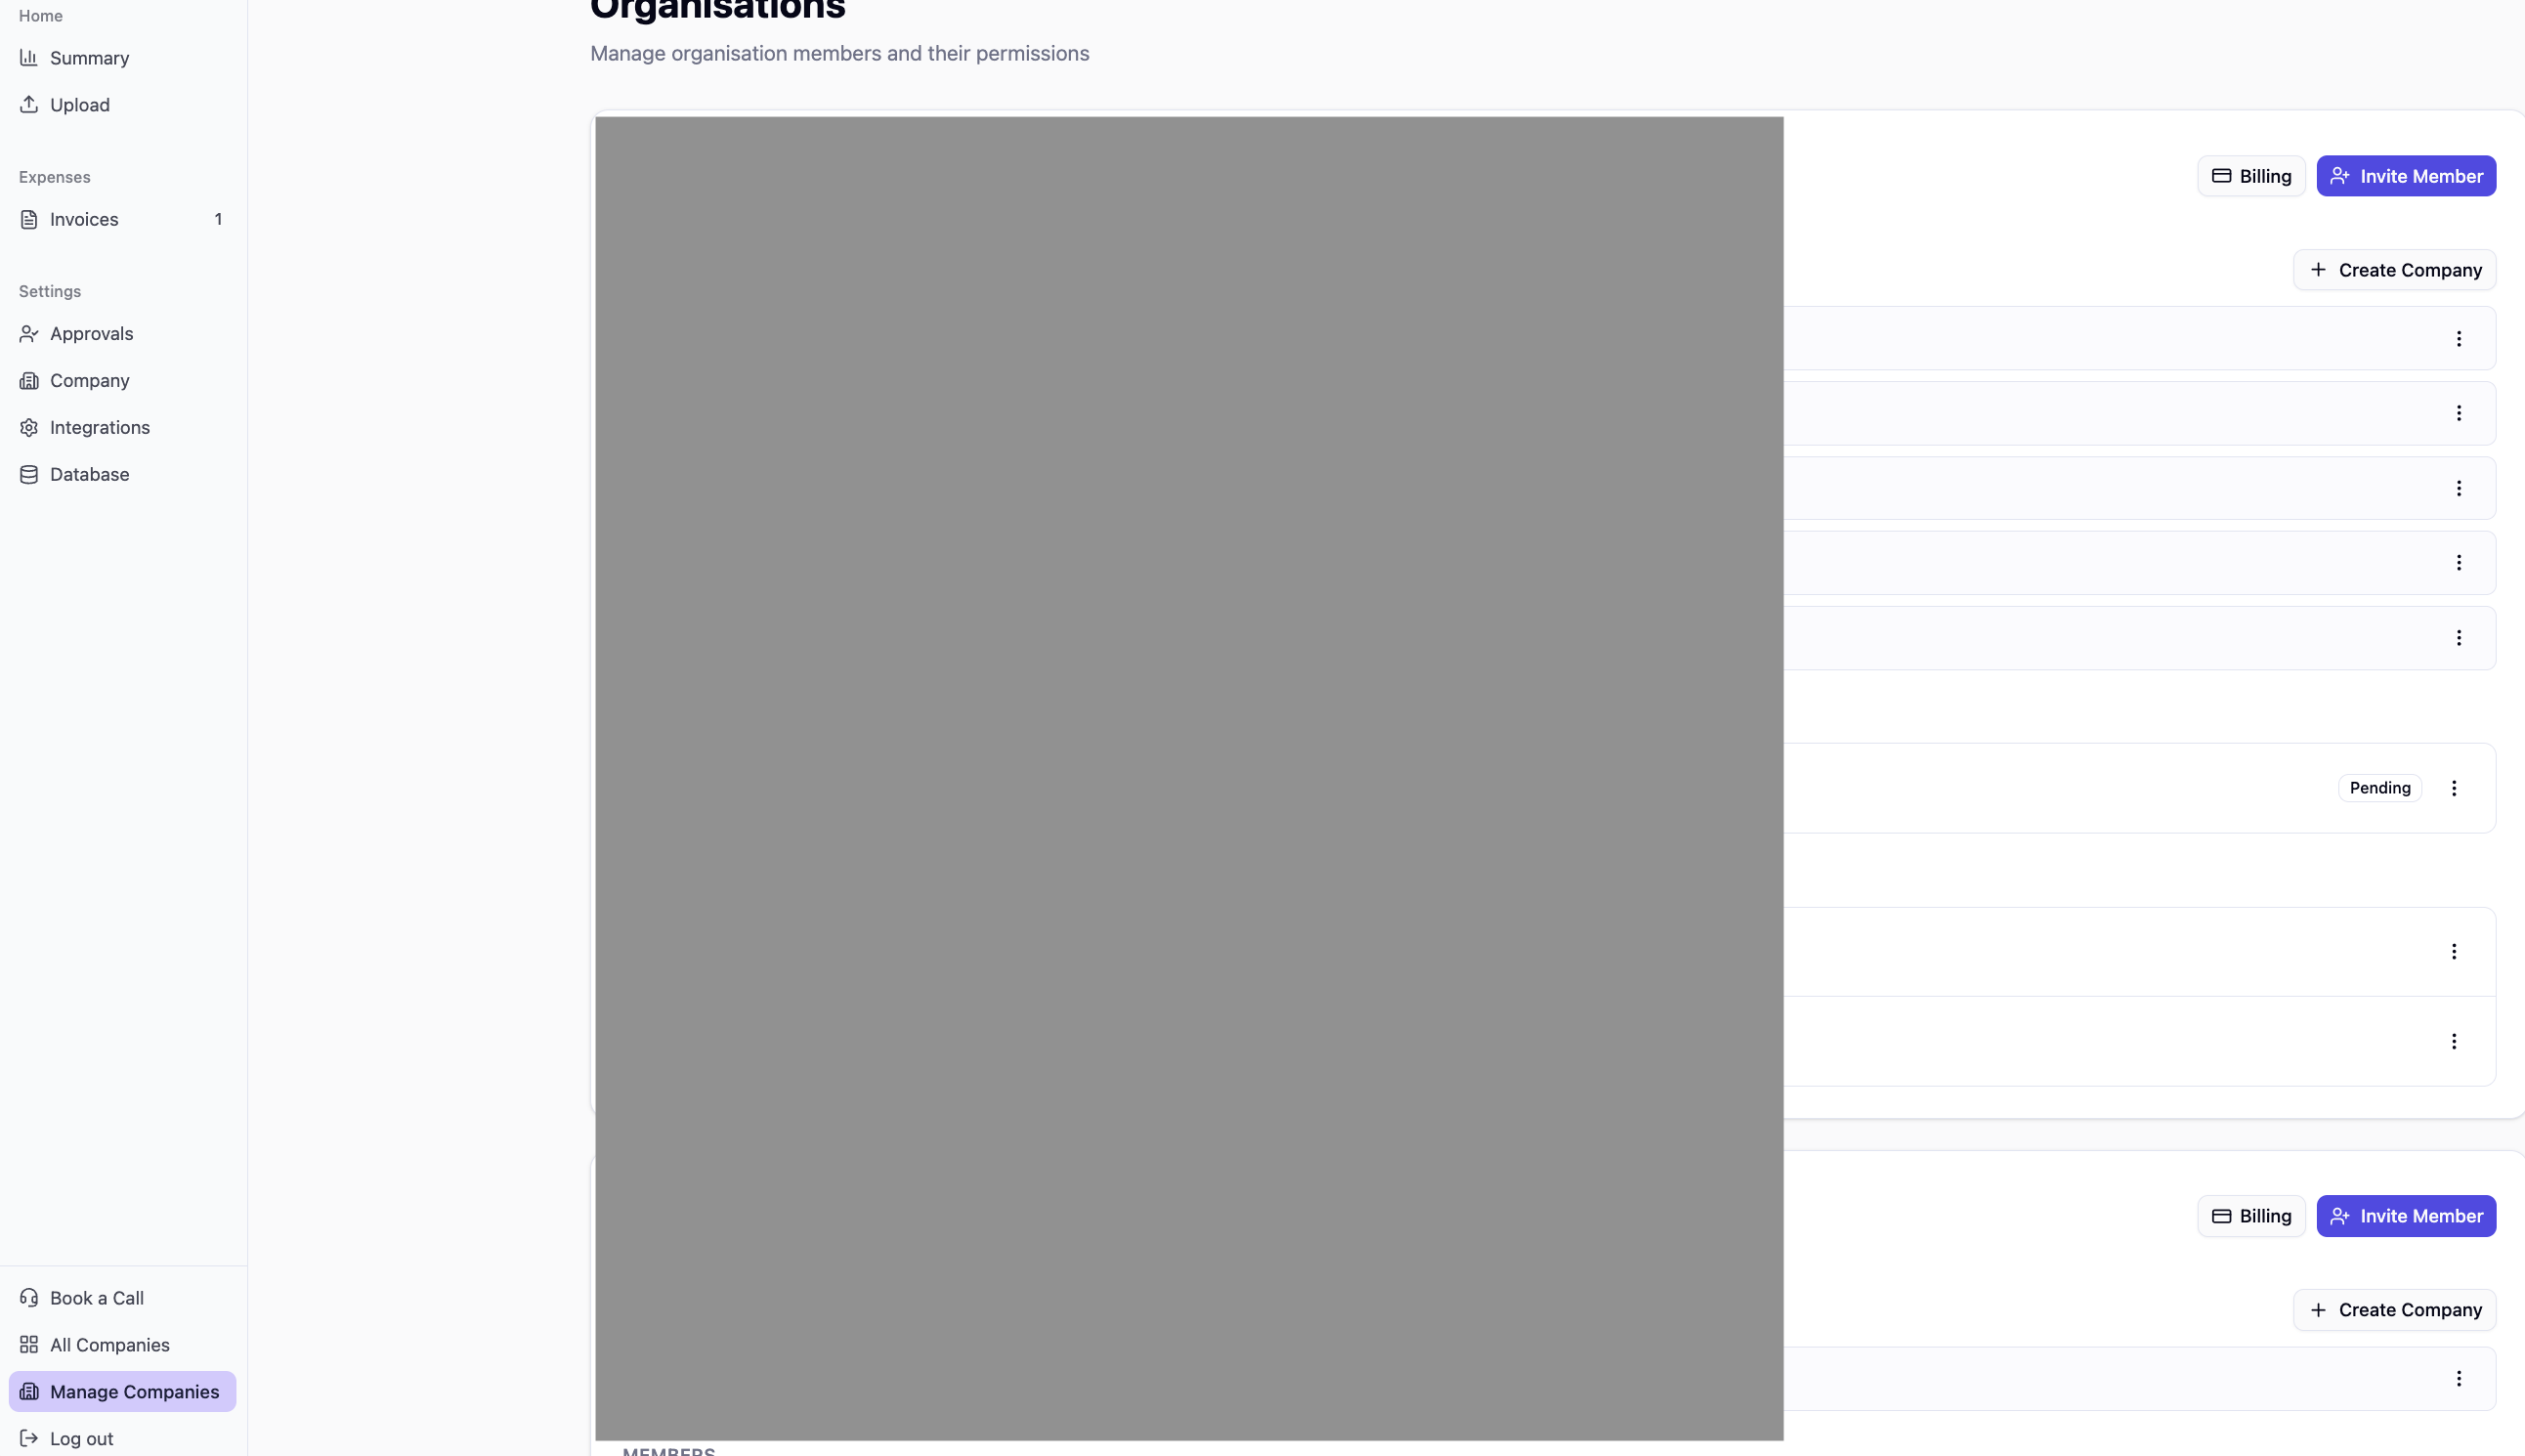
Invite your team from Settings → Manage Companies → Invite Member. When adding a user, you can select which companies you'd like them to have access to and what level of access they should have.
This lets you control who can view, code, approve, and manage invoices across each entity - so approvers only see the companies relevant to them and access is scoped from the start.
Configure Your Approval Rules
You can build multi-step approval workflows by vendor or amount, with as many approvers as you'd like. Or you can set invoices to auto-approve so they post directly to your accounting software without manual sign-off.
Go to Settings → Approval Rules to define how invoices are routed. You can combine conditions - for example, requiring two approvers in sequence for subcontractor invoices above a certain amount, while auto-approving smaller recurring bills from known suppliers.
Tip - keep it simple at first
Start with a single-approver rule for all invoices above your threshold. Once you've run a month of invoices through the system and have a feel for the volume and mix, add more granular rules. Complex approval matrices are easier to tune when you have real data to work from.
Process Your First Invoice
Upload
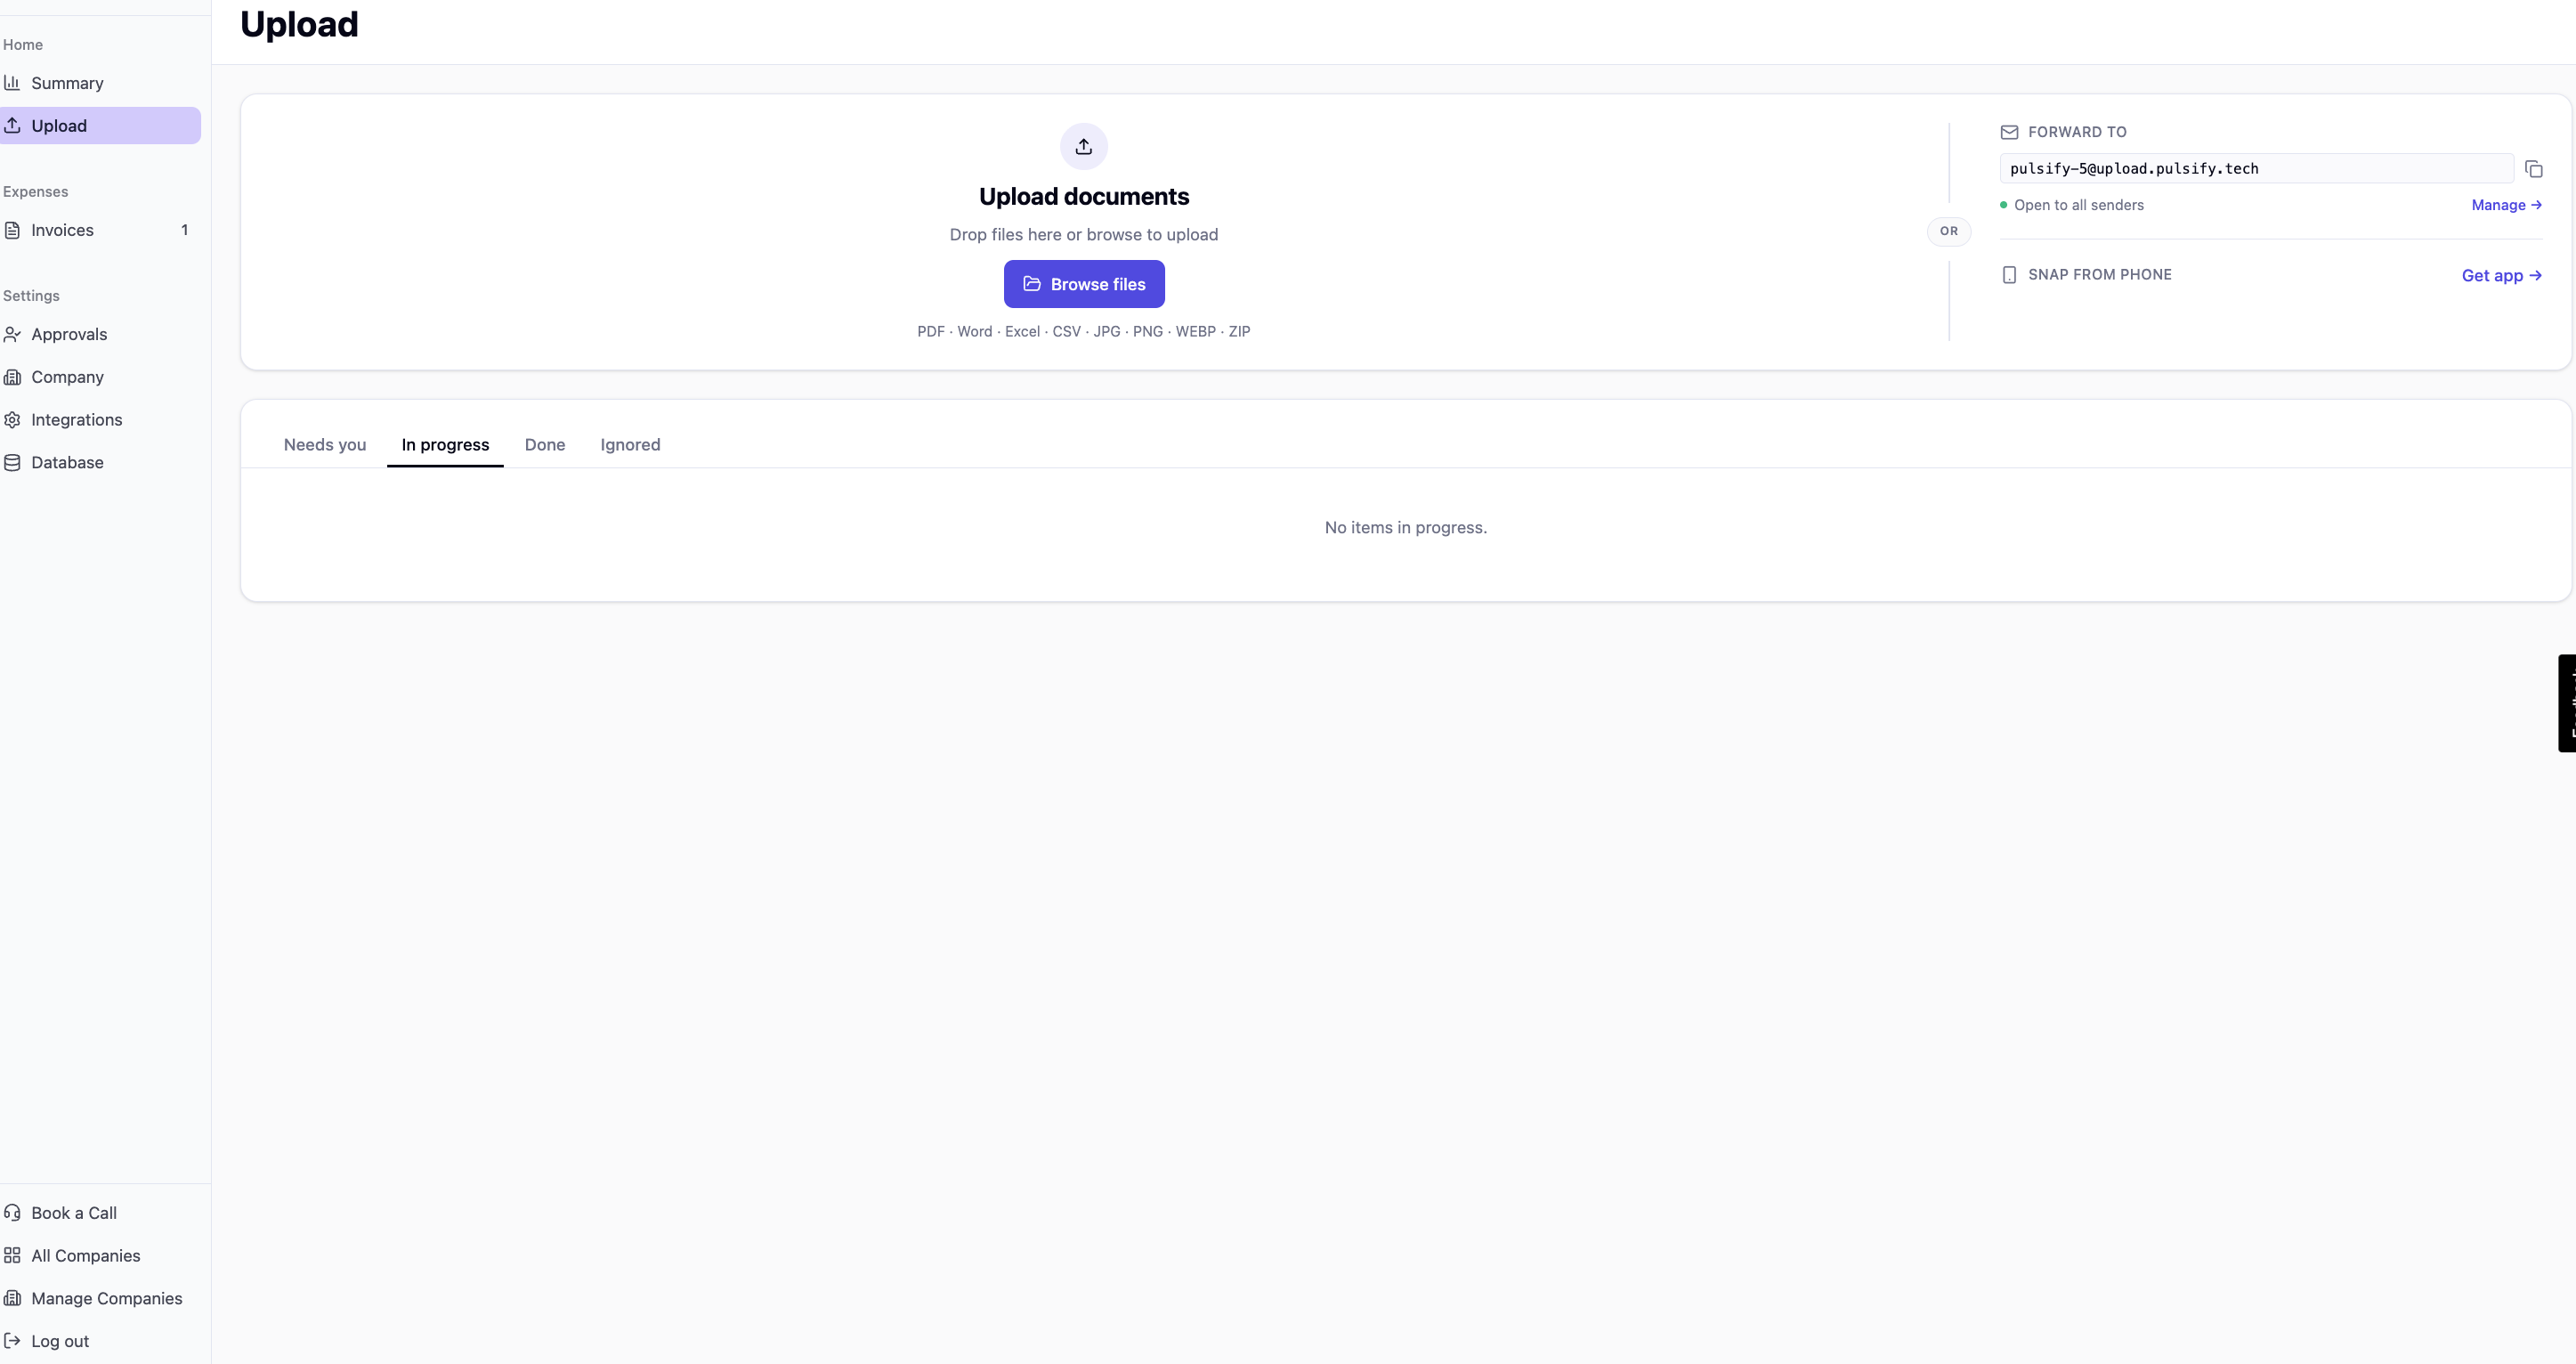
The Upload section is where you send documents for extraction. There are three ways to get invoices in:
- Drag and drop files directly into the upload area
- Forward by email to your unique Pulsify inbox address shown on the upload screen
- Snap from your phone using the Pulsify mobile app
Pulsify accepts PDFs, Word documents, Excel files, images (JPG, PNG, WEBP), CSVs, and ZIPs. Once uploaded, documents move through the Needs you, In progress, Done, and Ignored tabs so you can track where everything is at.
Summary
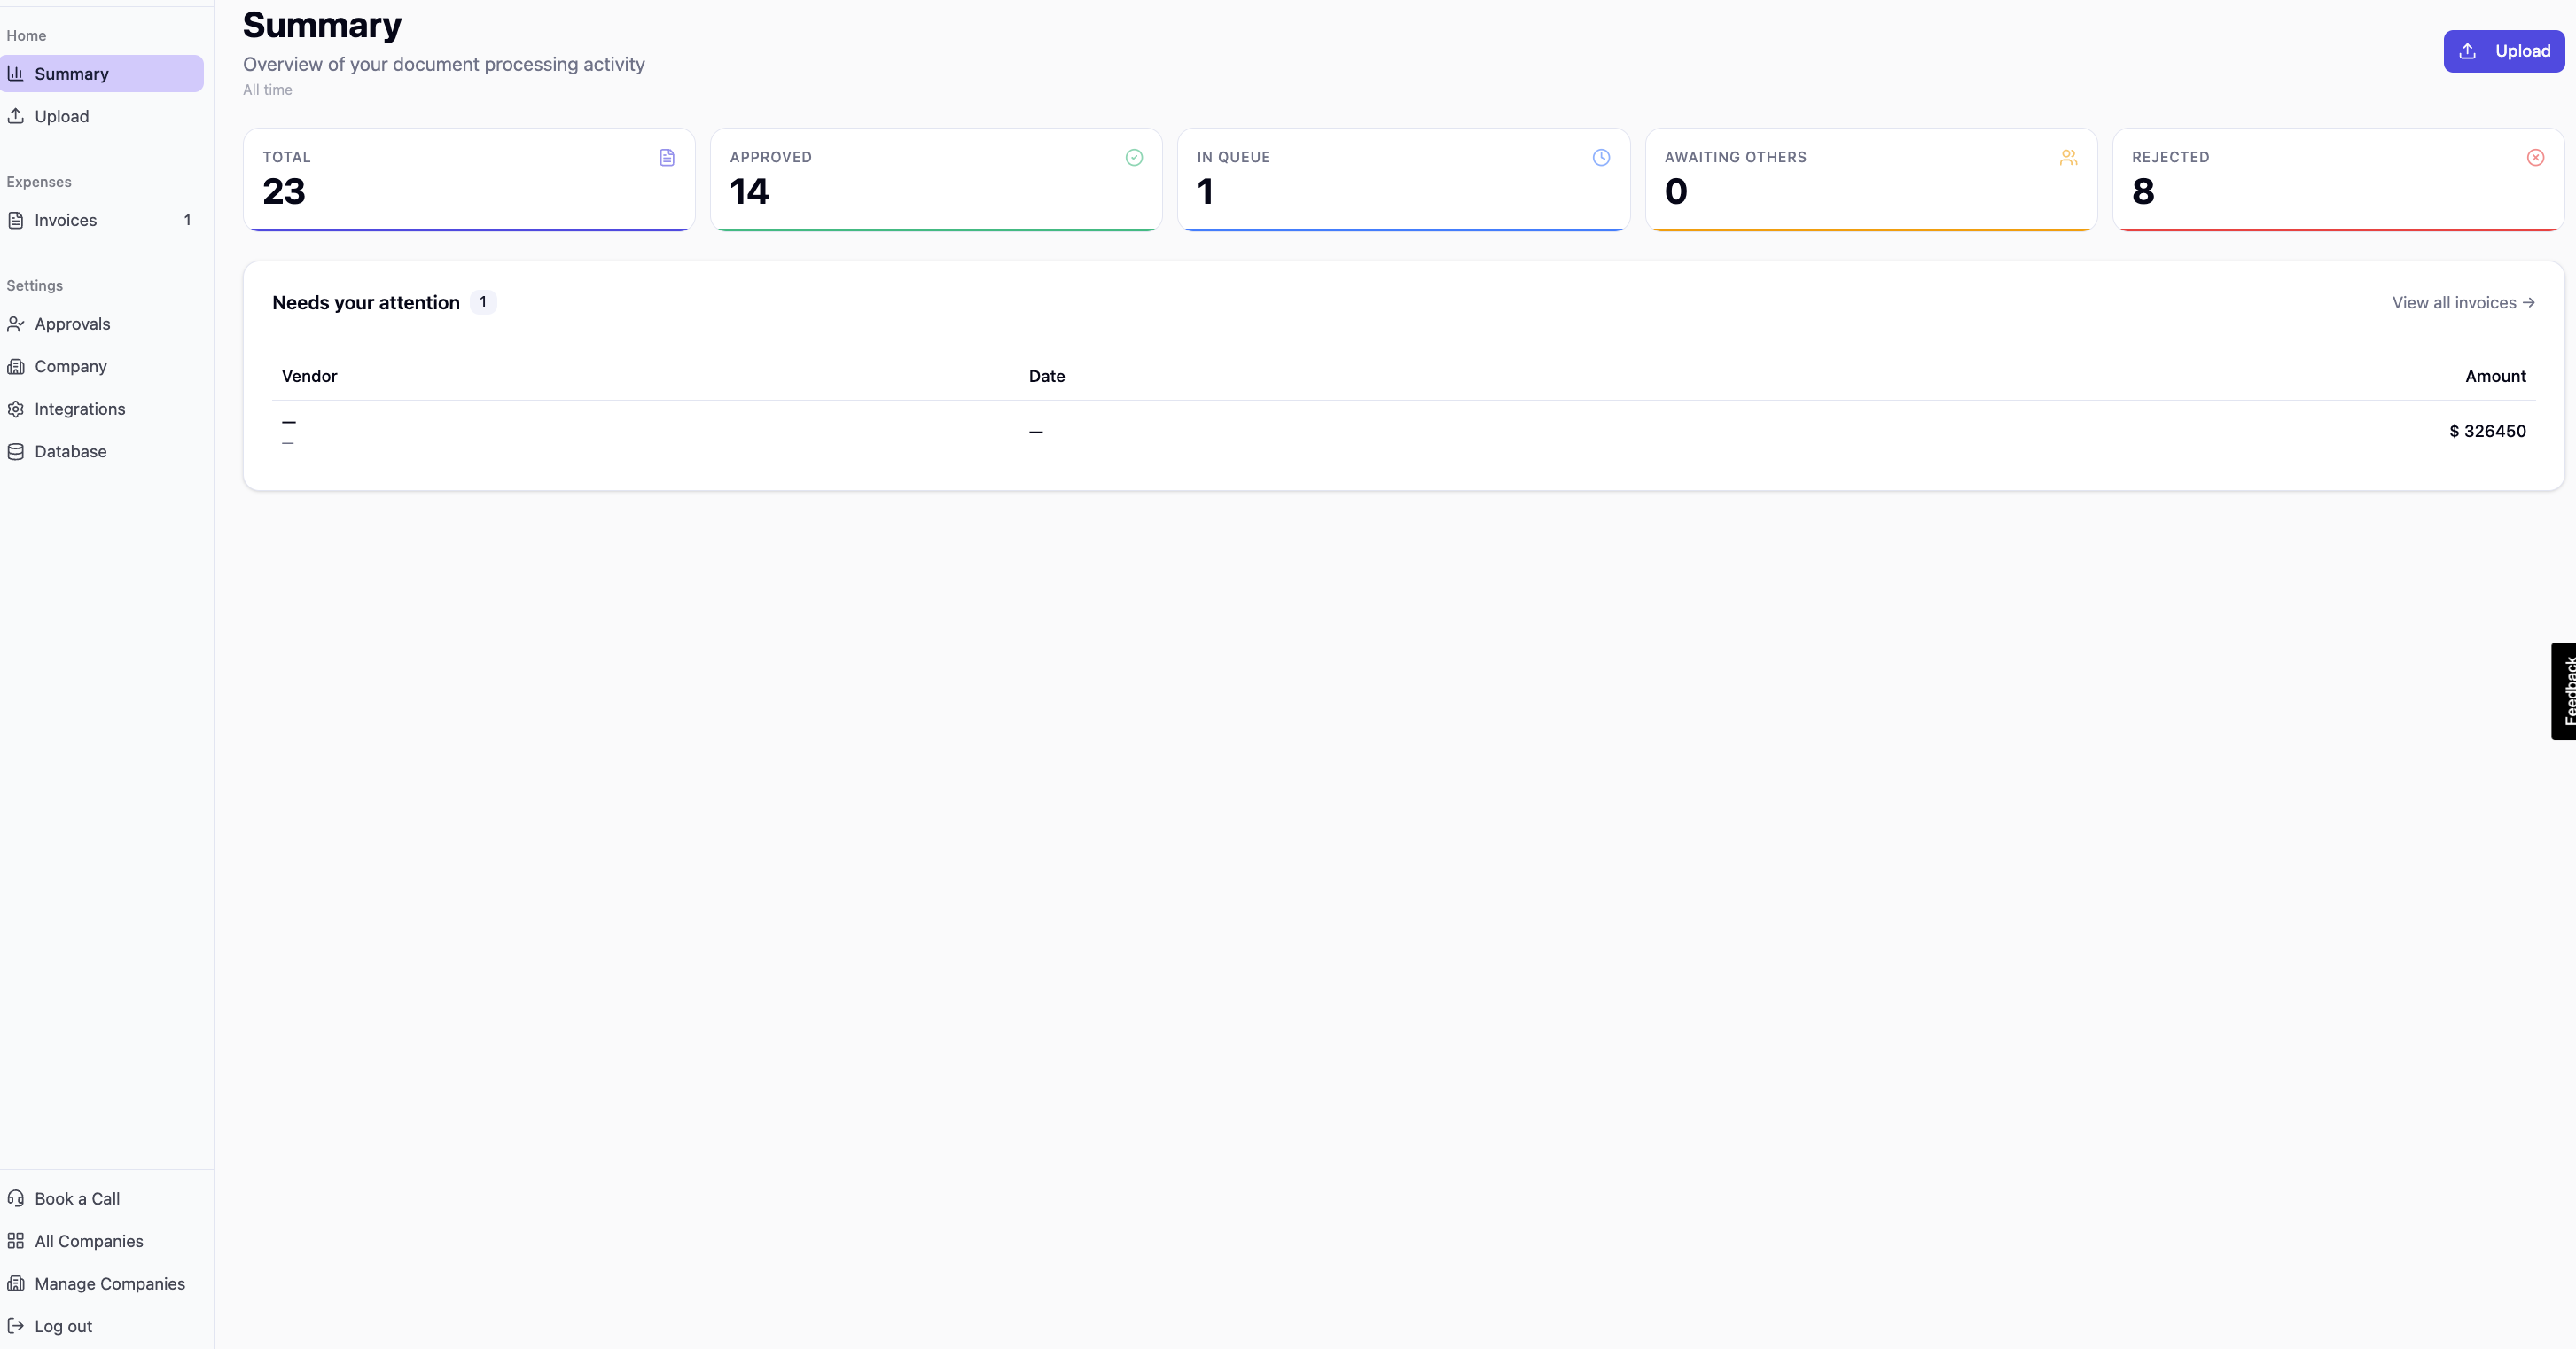
The Summary screen gives you an overview of your document processing activity. You can see totals at a glance: how many invoices have been approved, how many are sitting in the queue, how many are awaiting others, and how many have been rejected. Anything that needs your attention is listed below with the vendor, date, and amount.
Invoices and processing
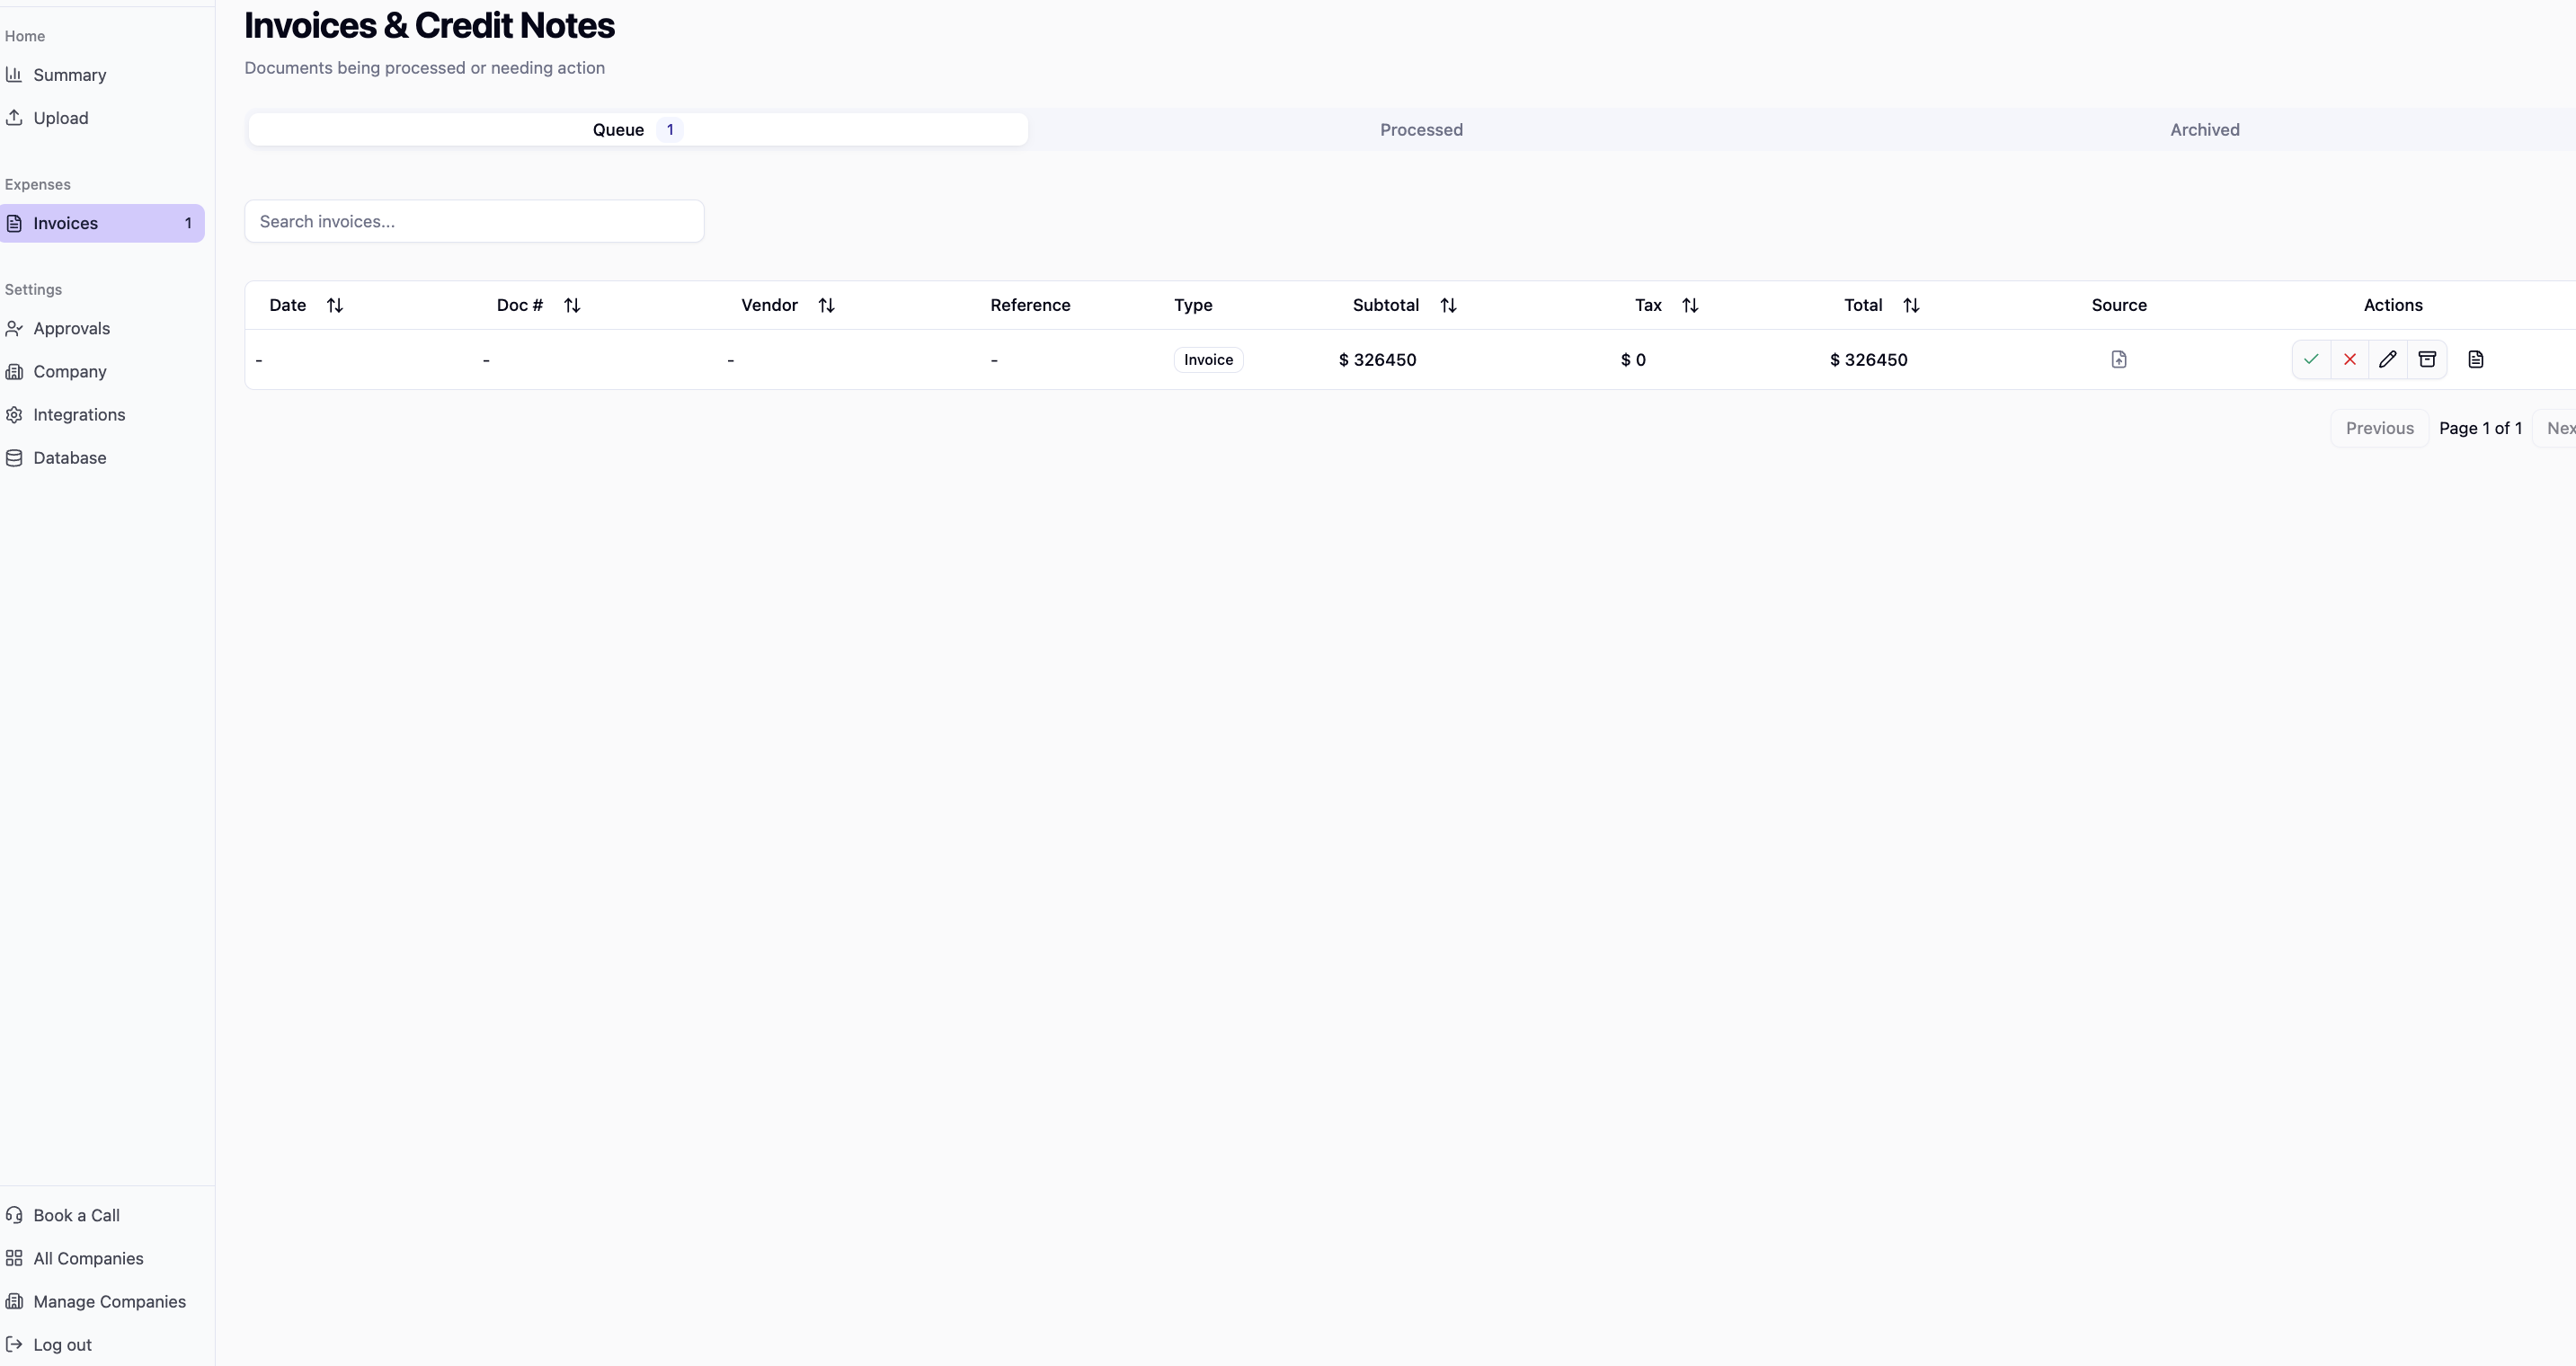
The Invoices section is where you find documents that need attention in your queue, or have already been processed. You can approve or reject documents directly from this view, or switch to the Processed and Archived tabs to see what has already been handled.
Click into any invoice to open the full review interface.
Reviewing an invoice
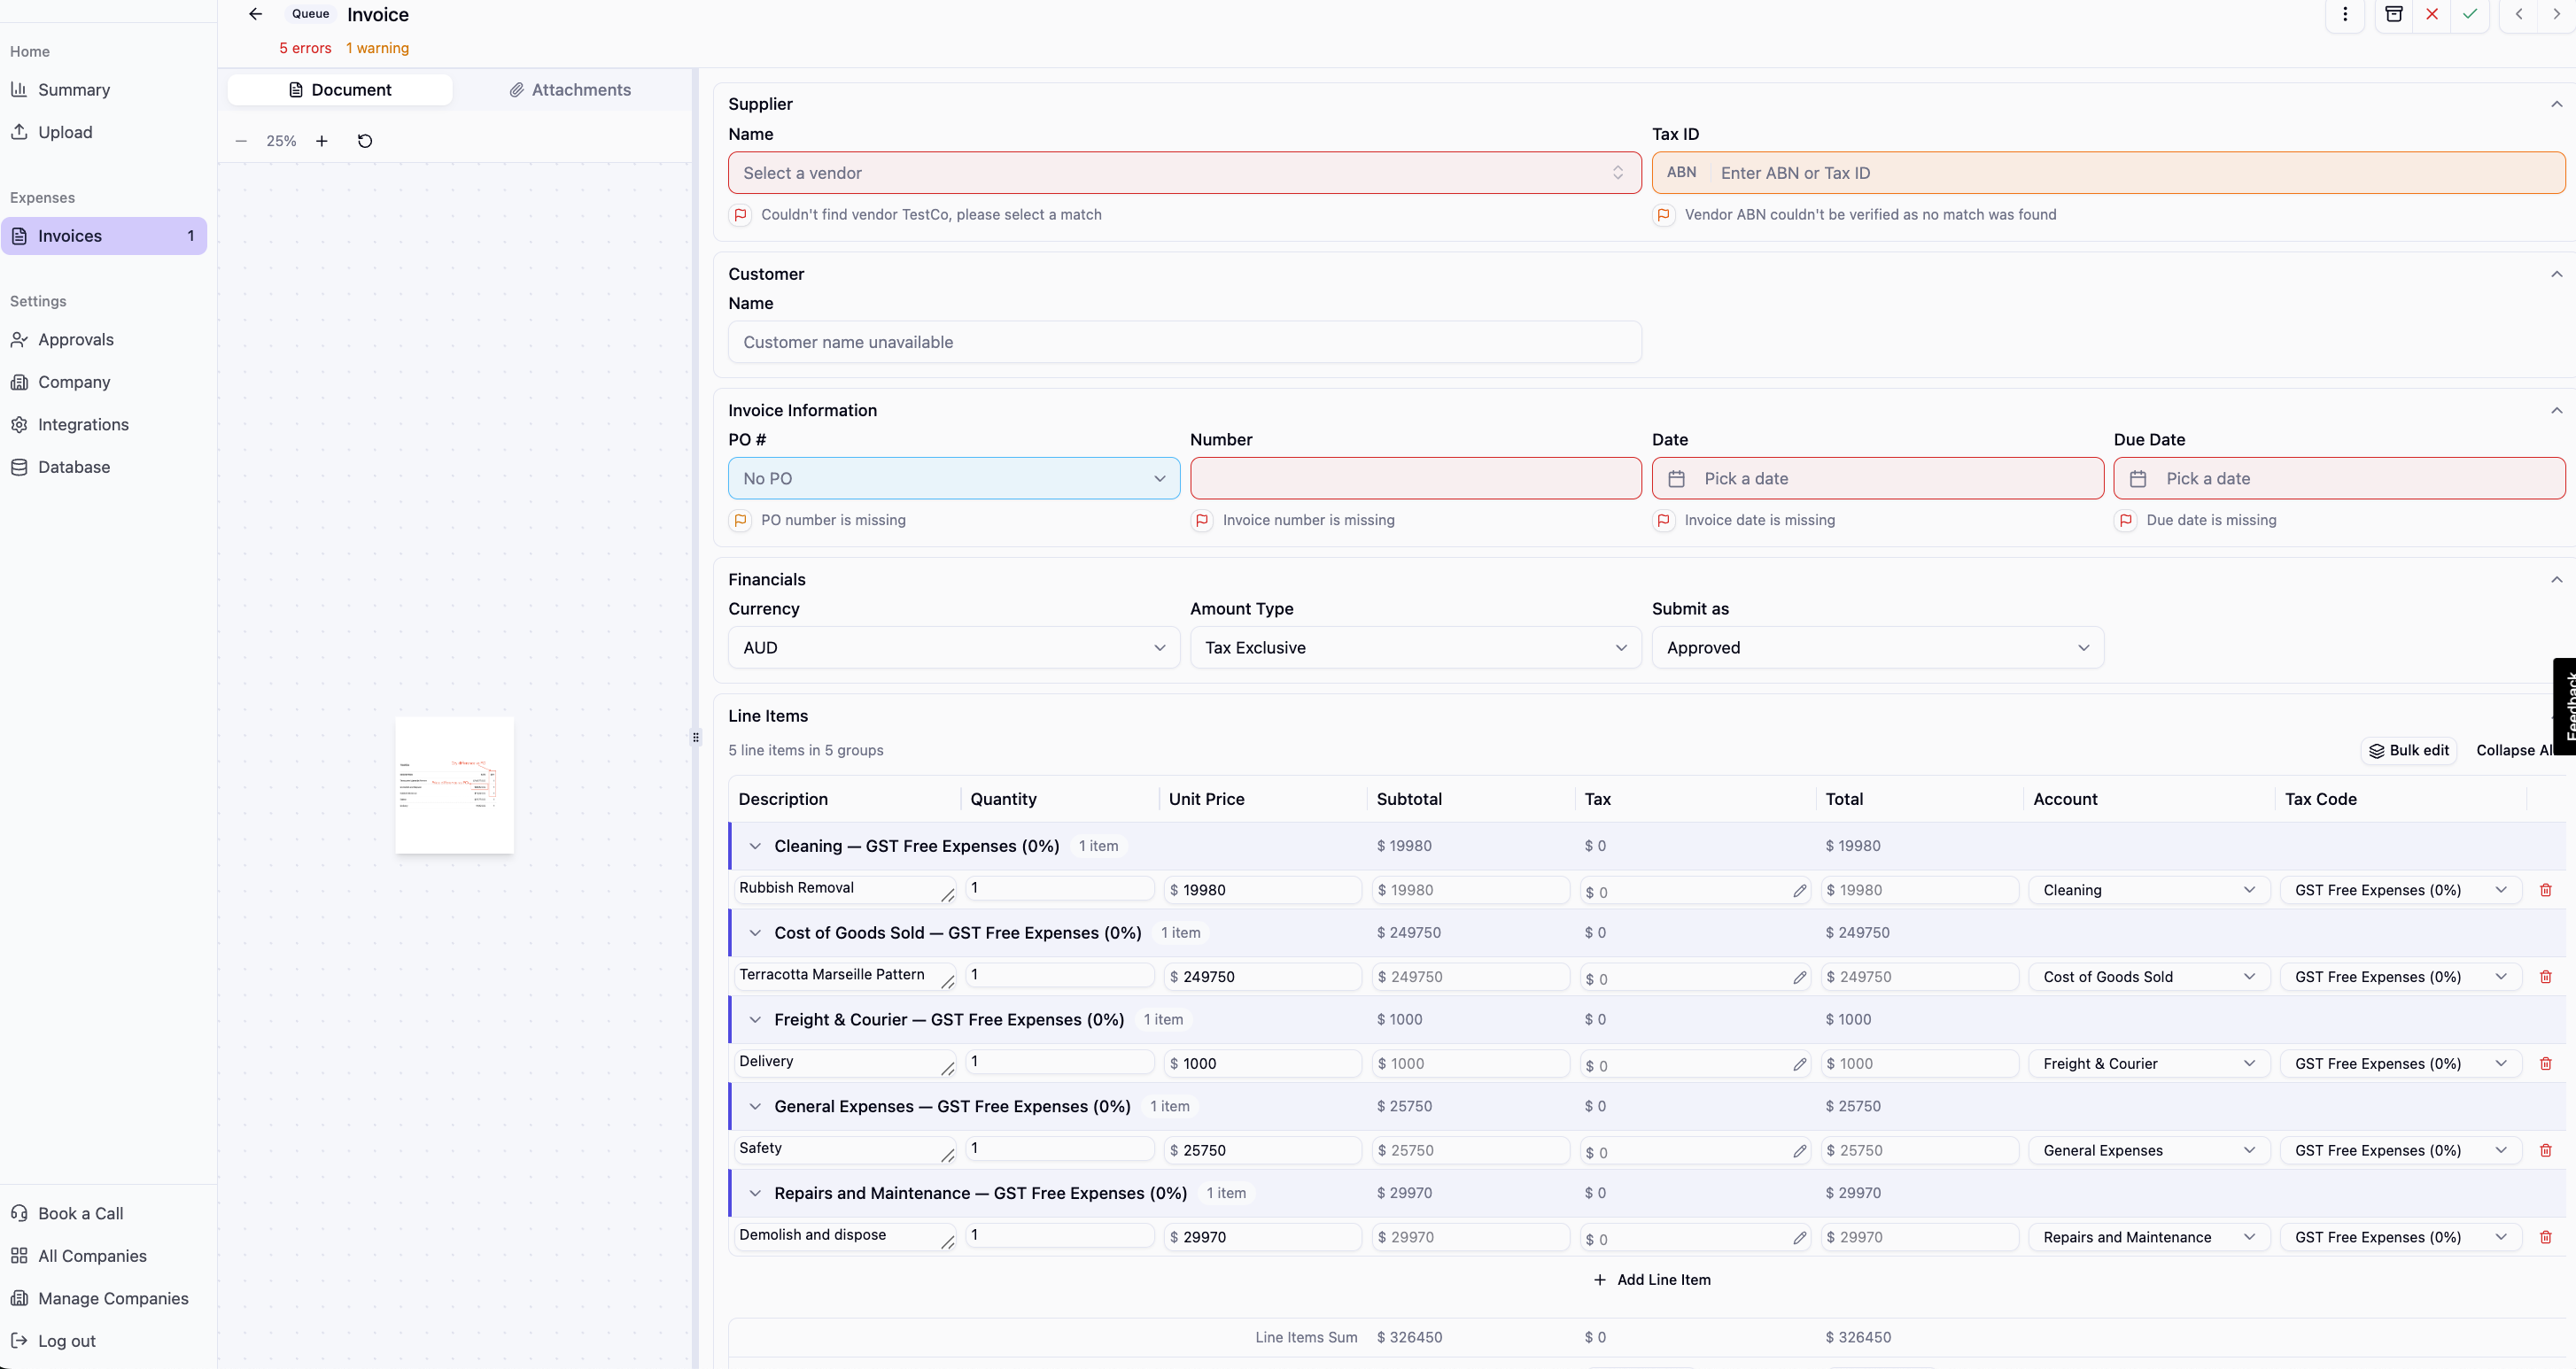
When you open an invoice, you'll see the original document on the left and the extracted data on the right. Hit the green tick to approve or the red cross to reject. If you're an approver, you'll also see an arrow to send the invoice back to someone earlier in the approval chain.
The fields are colour coded as a risk system. Red fields mean that Xero will block submission and must be resolved. Orange and yellow fields are important to review but won't prevent submission. You don't have to clear every non-red field before approving if you're comfortable with the values.
Pulsify suggests account codes and tax treatments based on your chart of accounts and supplier history. If anything looks wrong, correct it directly in the review panel. Pulsify learns from every correction, so the same supplier's next invoice will reflect the updated preference automatically.
Adding a new vendor
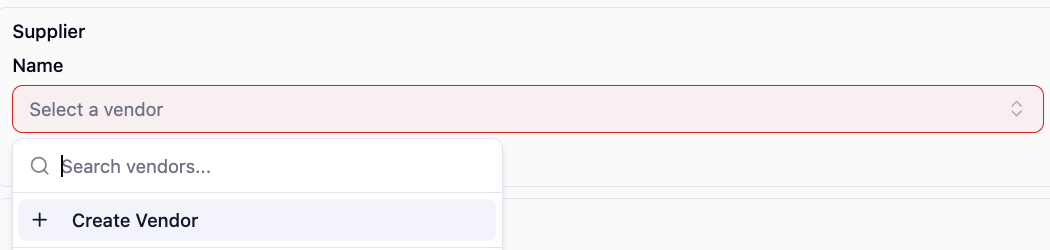
If the invoice is from a vendor that doesn't exist in your accounting software yet, select Create Vendor from the vendor dropdown and follow the prompts. The new vendor will be created in both Pulsify and your connected accounting software.
Update FX Settings
The base currency is set to AUD. You can update this in the Company section.
Pulsify also converts foreign currency amounts for POs and approvals. You can set a fixed FX rate for specific currencies, or the system will do a live update every 24 hours automatically.
Sync Your Database
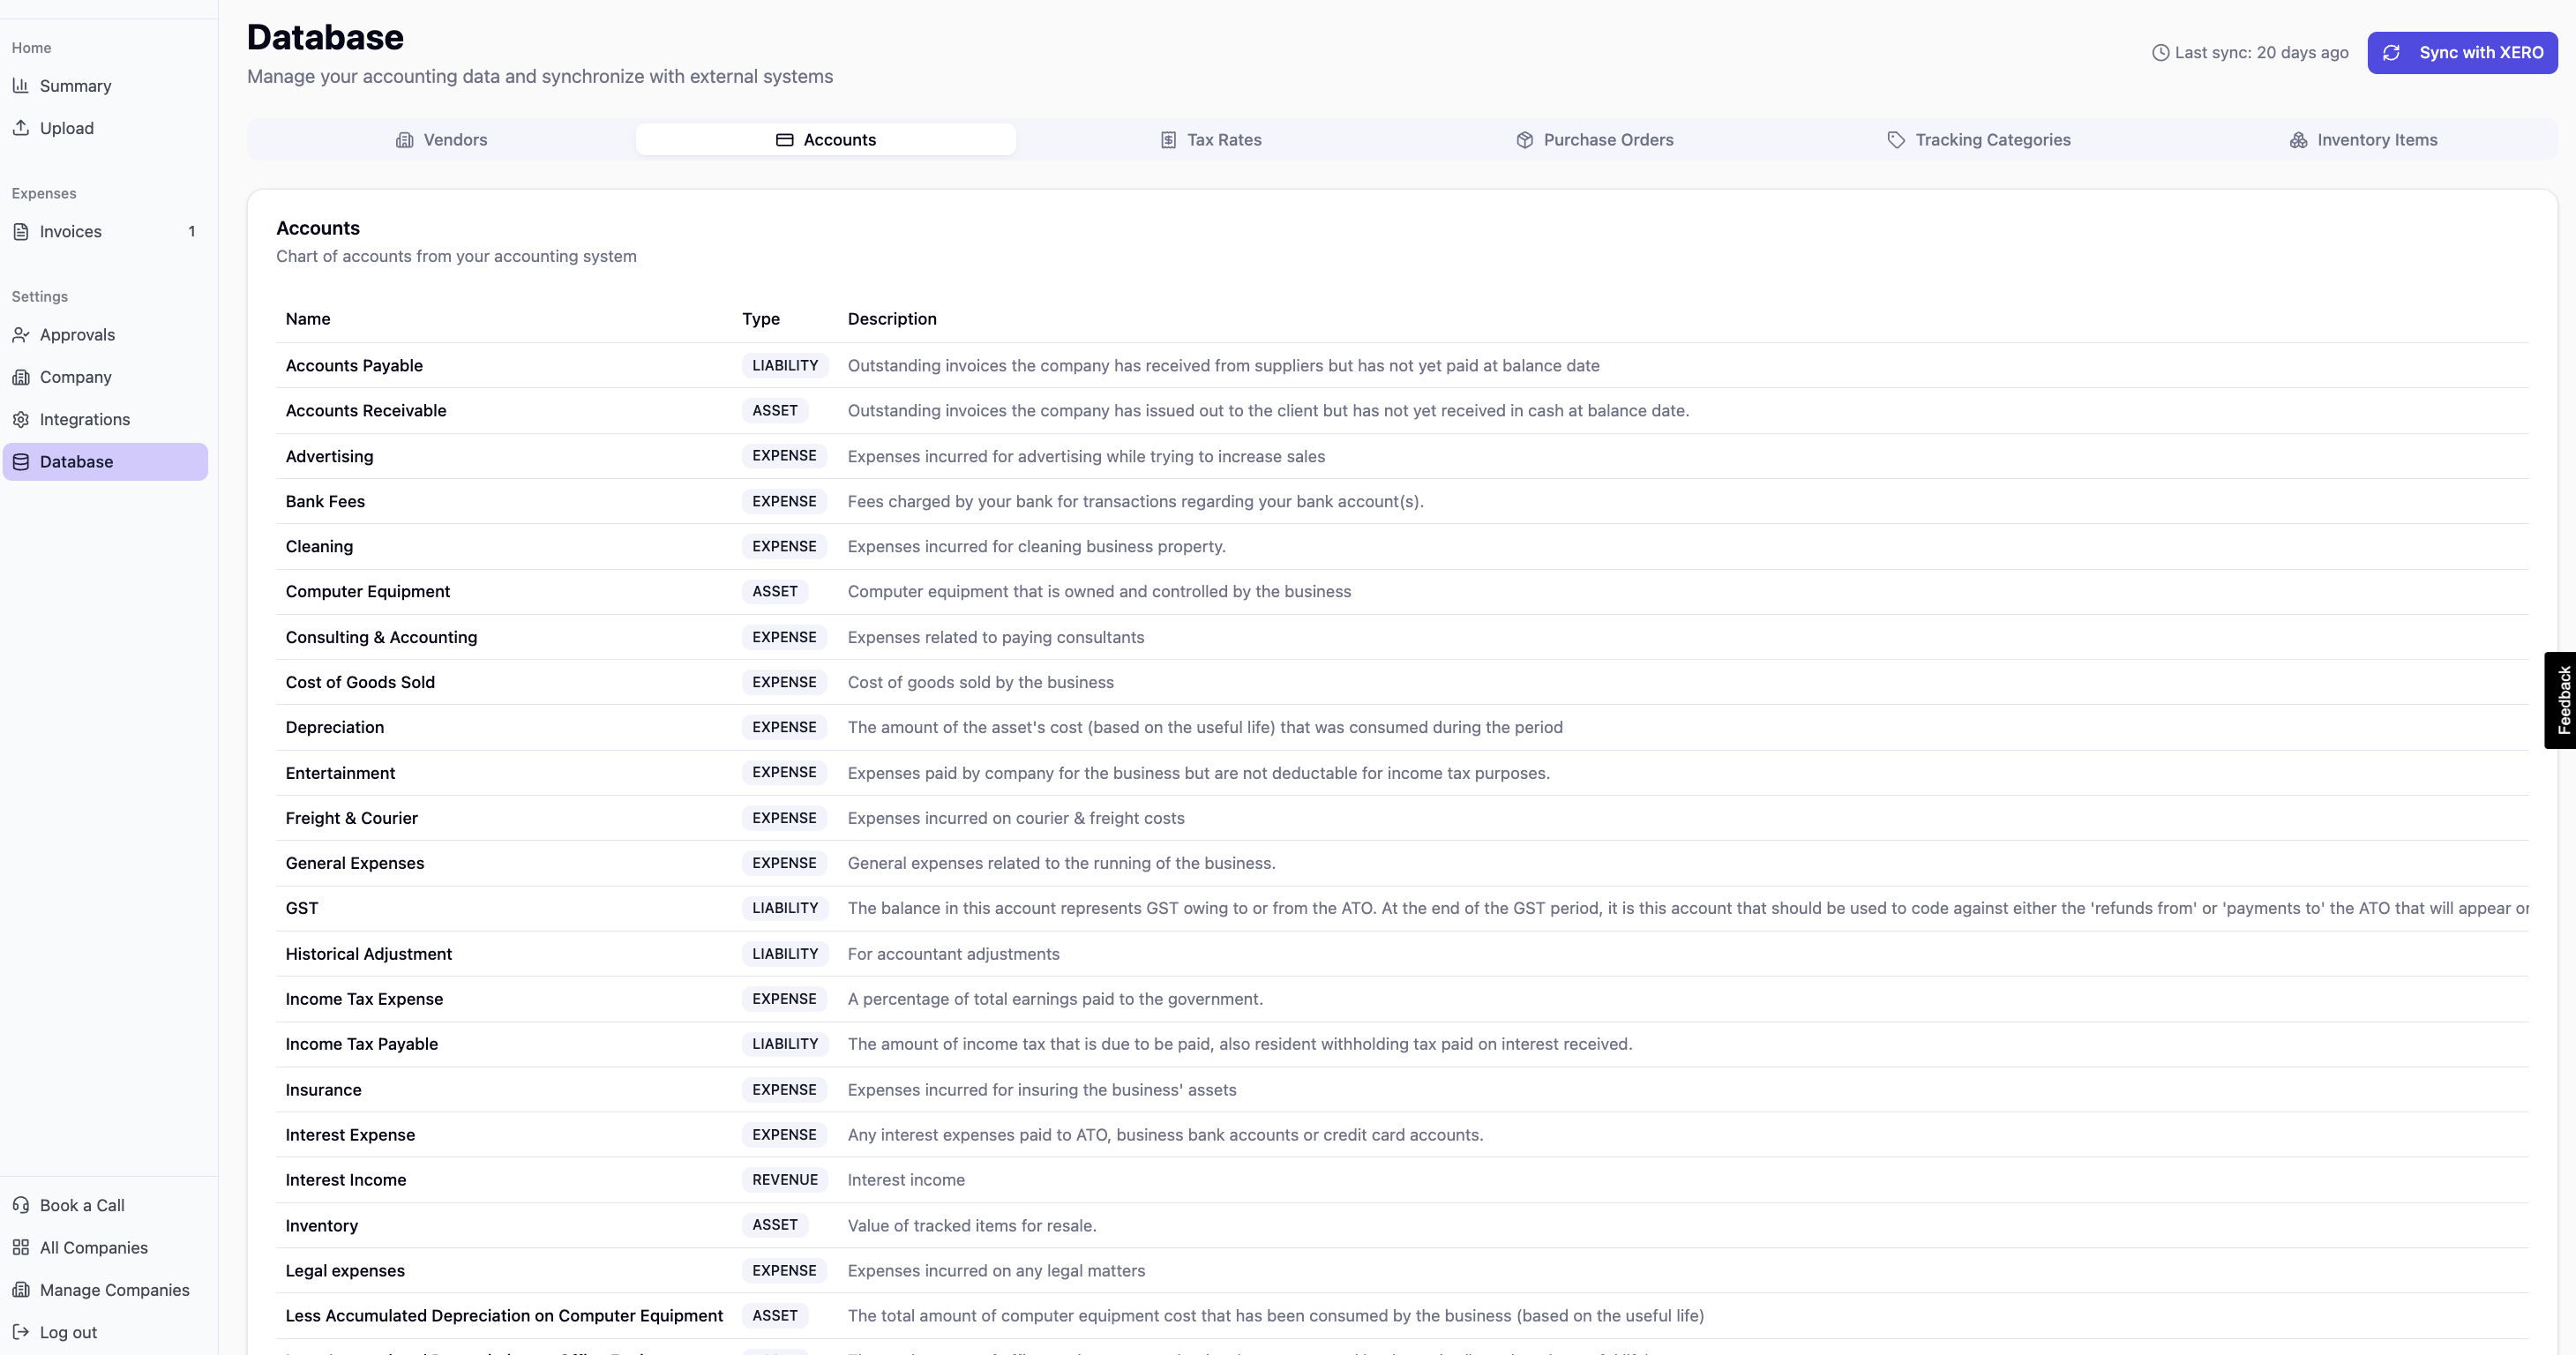
Sync your database to pull the latest information from your accounting software into Pulsify. This ensures your chart of accounts, supplier list, tax codes, tracking categories, purchase orders, and inventory items are up to date before you start processing invoices.
Common questions
Can I connect both Xero and MYOB?
Yes. Each entity in Pulsify can connect to either Xero or MYOB independently. If you have one entity on Xero and another on MYOB, both can be managed from the same Pulsify account. Multi-entity setups are available from the Scale plan.
How long does it take to process an invoice?
Most invoices are extracted and coded within 30–90 seconds of being uploaded. Complex invoices with many line items or unusual formats may take slightly longer. You'll receive a dashboard notification once each invoice is ready to review.
Next steps
Once you're processing invoices, explore what else Pulsify can do.
Need help getting set up?
Book a 30-minute onboarding call with the Pulsify team. We'll walk through your setup, answer questions, and make sure your first invoices process correctly.
Book a free onboarding call