
Before you start
Connect Xero or MYOB first. The Upload page asks you to connect before it accepts documents. See Connect Xero or MYOB.
1 Copy your forwarding address
Click Upload in the sidebar. Your company's address is under Forward to. It looks like yourcompany@upload.pulsify.tech.
The easiest setup is a forwarding rule on the inbox your suppliers already use, like accounts@ or invoices@. Every invoice then reaches Pulsify without anyone touching it. You can also forward single emails by hand. If your suppliers email a Microsoft 365 mailbox, you can connect it directly and choose which emails to send in.
For paper invoices and receipts, install the mobile app and take a photo.
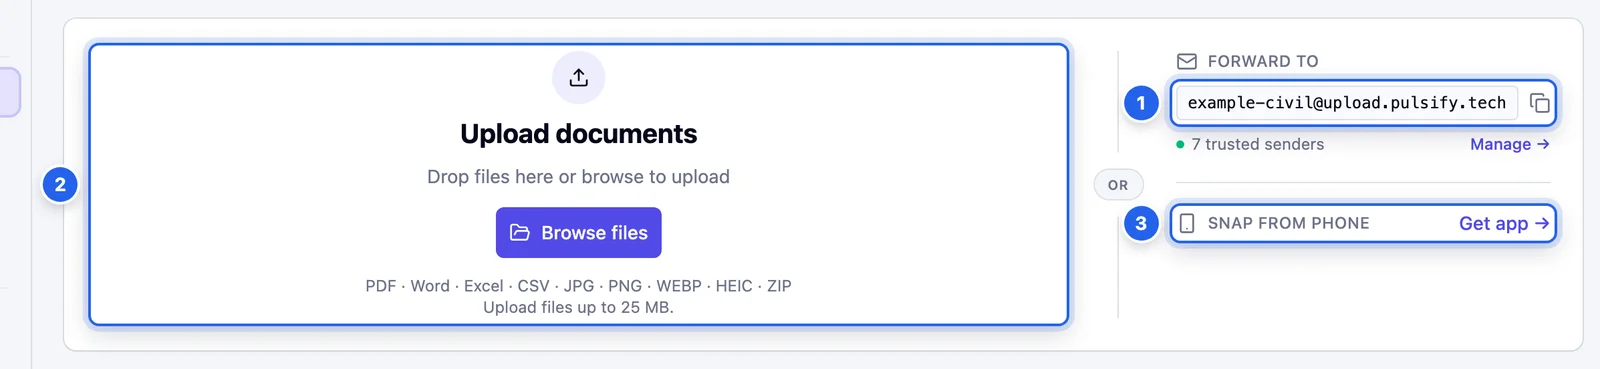
- 1 Your forwarding address. Click the copy icon next to it.
- 2 Drop files here or click Browse files.
- 3 Get app to snap paper invoices on your phone.
2 Choose who can email documents in
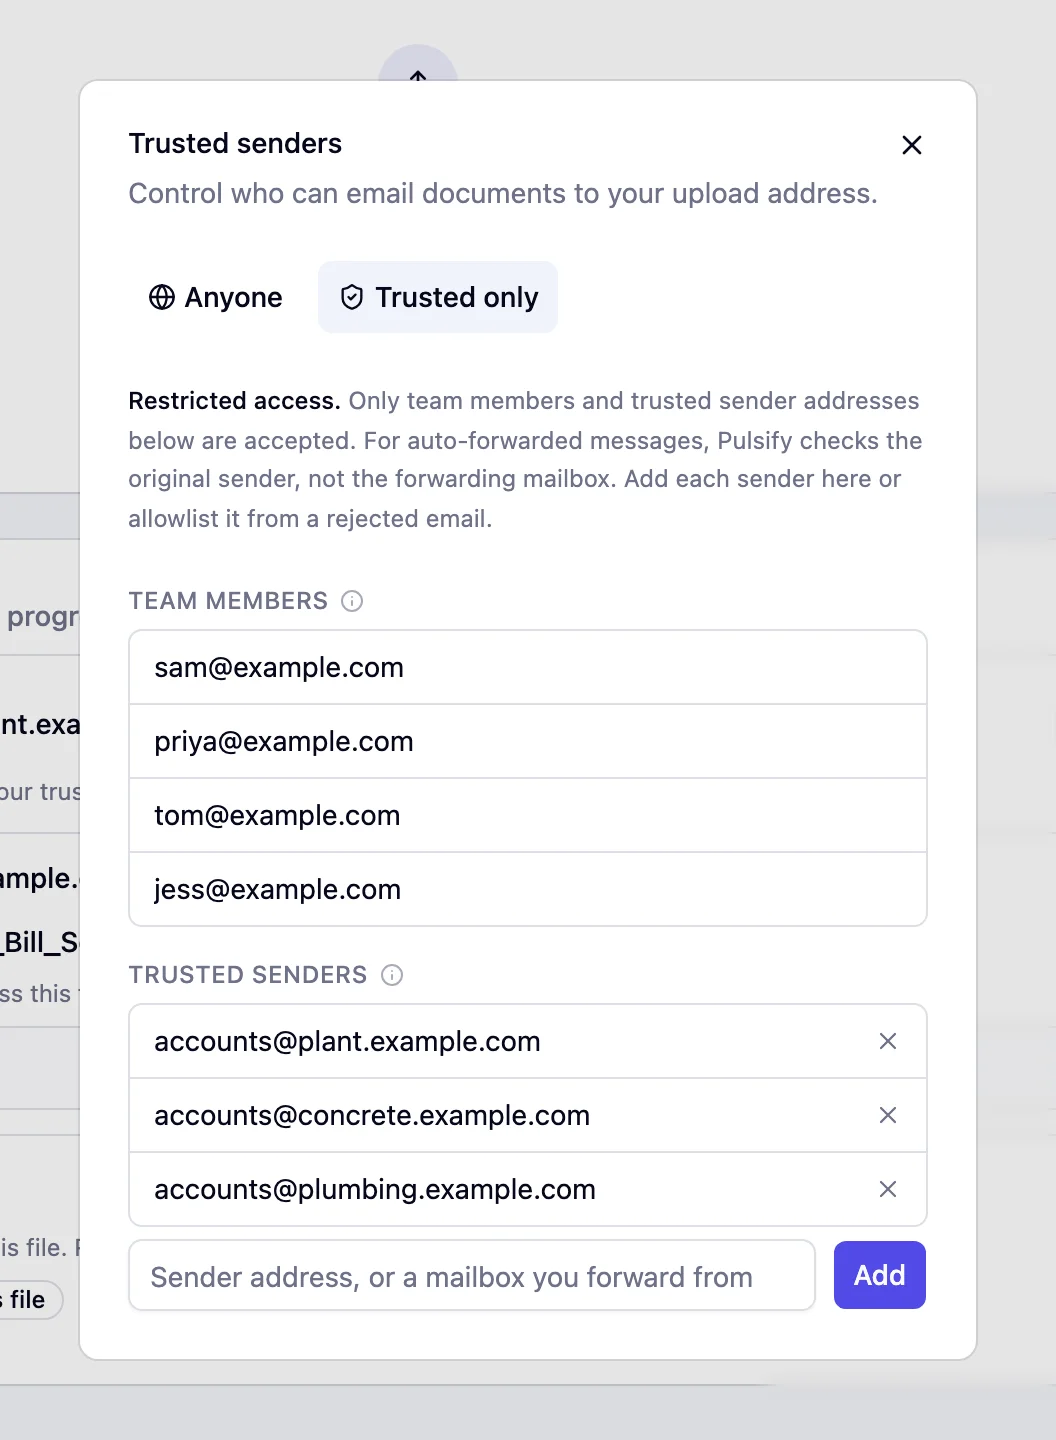
Click Manage next to trusted senders. You have two options:
- Anyone. Pulsify reads every email sent to your address.
- Trusted only. Pulsify only reads emails from your team and the addresses you add here. Pulsify also checks that the email came from the sender's domain. Everything else waits for you under Needs you.
Trusted only is the safer choice. If you forward from a shared inbox, Pulsify checks who originally sent the email, not the inbox that forwarded it. So add your suppliers' addresses. Only Admins can change these settings.
3 Watch documents come through
The In progress tab shows each document as Pulsify works on it. When a document is done, it moves to the Done tab and appears in the matching queue (Invoices, Supplier Statements or POs), ready to review.
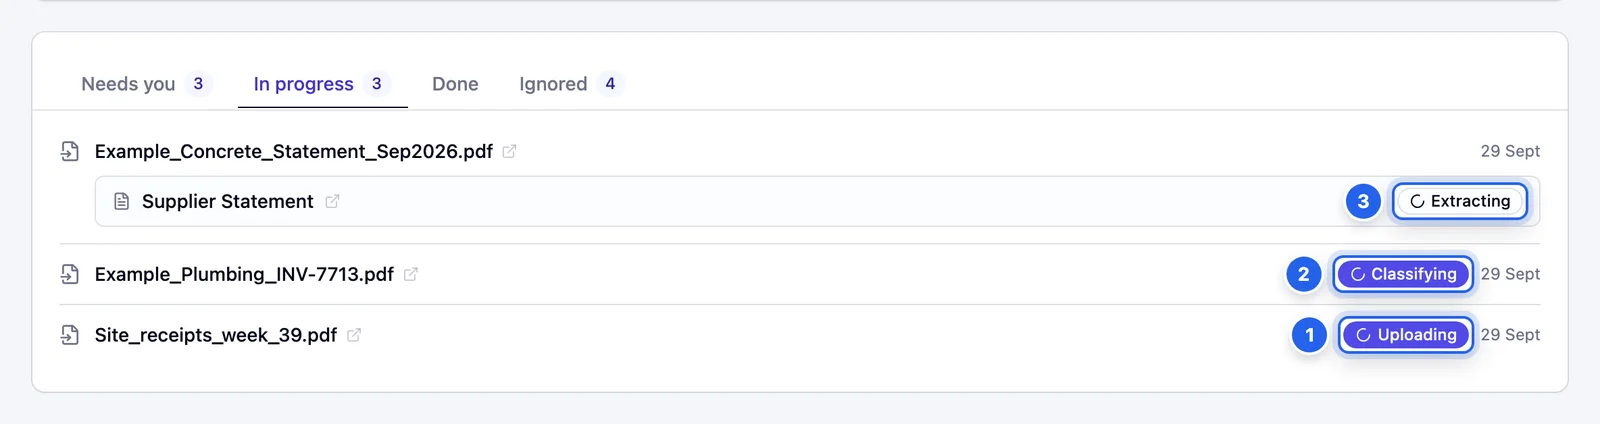
- 1 Uploading. The file is on its way.
- 2 Classifying. Pulsify works out whether it's an invoice, credit note, PO or something else.
- 3 Extracting. Pulsify reads the supplier, amounts and line items.
4 Clear anything that needs you
The Needs you tab lists anything Pulsify won't handle on its own:
- Emails Pulsify turned away, such as a failed sender check, no accounting connection or the plan limit. A sender who is not on your trusted list shows This sender is not on your trusted list yet.
- Files Pulsify failed to process. Click Retry. If the row says why it failed, like a spreadsheet too big to convert, there's no Retry. Split the file or upload a PDF instead.
- Files that match one you already sent. These show Review potential duplicate. Click Process anyway or Dismiss.
Dismiss removes an item from the Upload page. Files Pulsify can't use go to the Ignored tab. If Pulsify couldn't tell what a document is, Process as sends it through as an invoice or adjustment note, or as a purchase order or supplier statement where you use them.
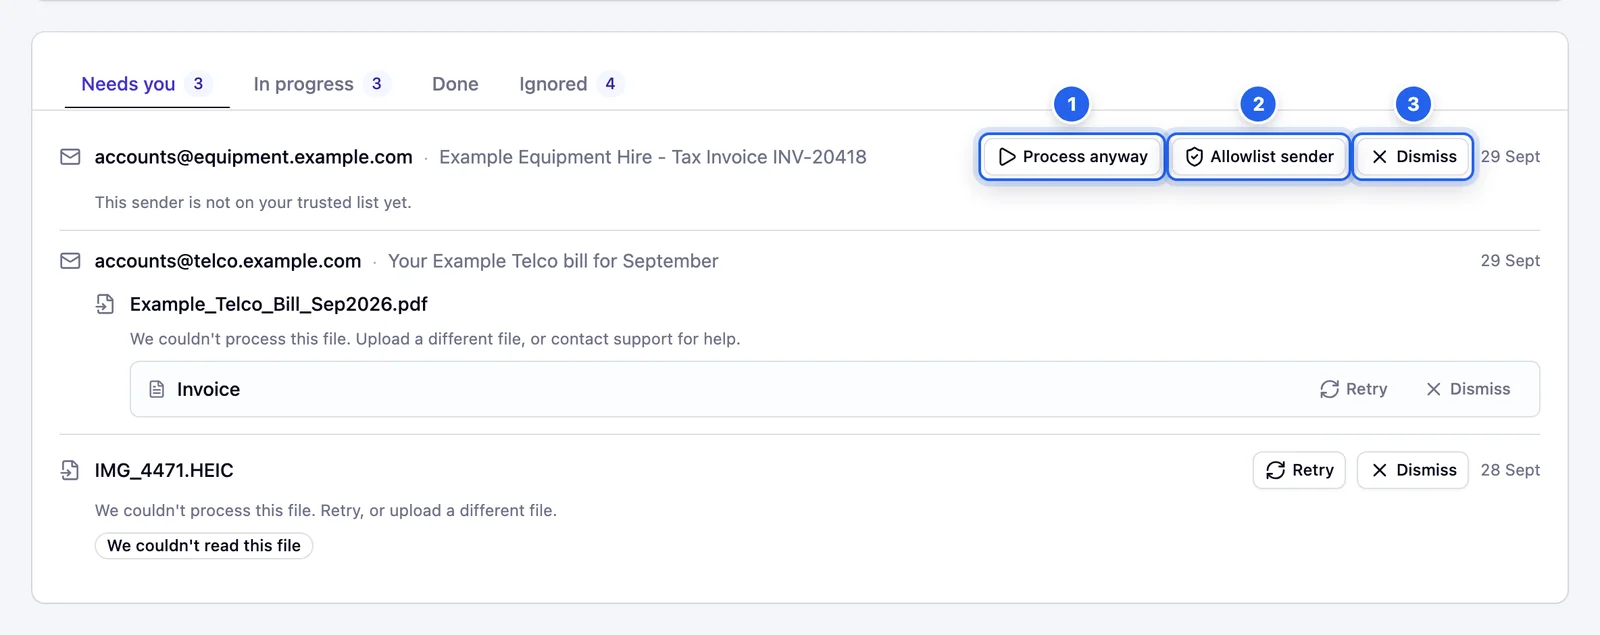
- 1 Process anyway reads this one email.
- 2 Allowlist sender adds the sender to your trusted list.
- 3 Dismiss removes it from the list.
Common questions
What file types can I send?
PDF, Word, Excel, CSV, JPG, PNG, WEBP, HEIC and ZIP files. Files you upload can be up to 25 MB each.
What if one PDF has several invoices in it?
Send it as it is. Pulsify splits it into separate documents and works out which pages are invoices, credit notes, supplier statements or purchase orders (if you use them).
Where do forwarded emails show up?
Once Pulsify has read them, invoices and credit notes land in your Invoices queue. The Upload page keeps a record of each email and file. Finished ones are under the Done tab.
An email came from a supplier I trust but it went to Needs you. Why?
Your upload address is set to Trusted only. If the sender is not on the list, click Allowlist sender. Their emails then go through if they pass the domain check. If they are already on the list, the email failed the domain check. Ask their IT contact to check SPF and DKIM. An Admin or Approver can click Process anyway to read this one email. Only Admins and Reviewers can allowlist a sender.
Stuck on something?
Book a call and we'll set it up with you.