
Before you start
- The PO module works with Xero. MYOB companies can still match invoices to POs.
- You need to be a company Admin to turn it on.
1 Turn on purchase orders
Go to Settings and open General under your company. Fill in Company details. They're printed on every PO you send. Your supplier sees who it's from and where to deliver.
Then turn on Purchase orders. A POs item appears in the sidebar. Turning it off later hides the module but keeps your POs.
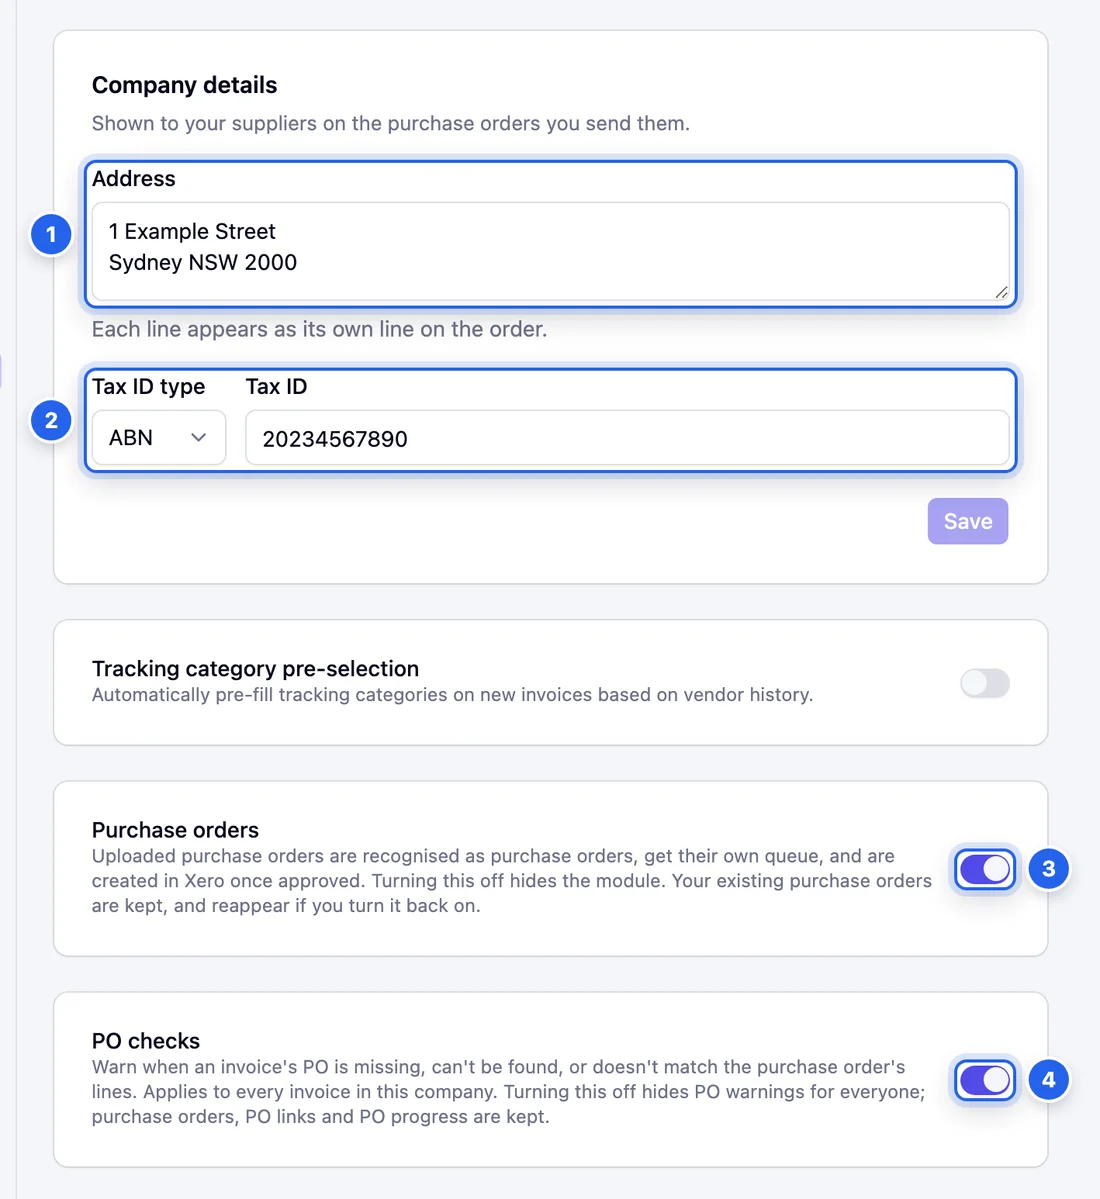
- 1 Address. Each line prints on its own line of the PO.
- 2 Tax ID type and Tax ID, usually your ABN.
- 3 Purchase orders turns the module on.
- 4 PO checks warns when invoices don't match their PO.
2 Create a PO
Click POs in the sidebar, then Add PO. Pulsify opens a blank draft that only you can see.
- Pick the Supplier.
- Leave PO # empty and Xero will assign the next number, or type your own.
- Add a Delivery date and a Delivery address with any instructions for the supplier.
- Add the items you're ordering, with the account, tax rate and job for each.
Click Complete when it's ready. If your POs have approval steps, the button reads Send for approval. See step 4.
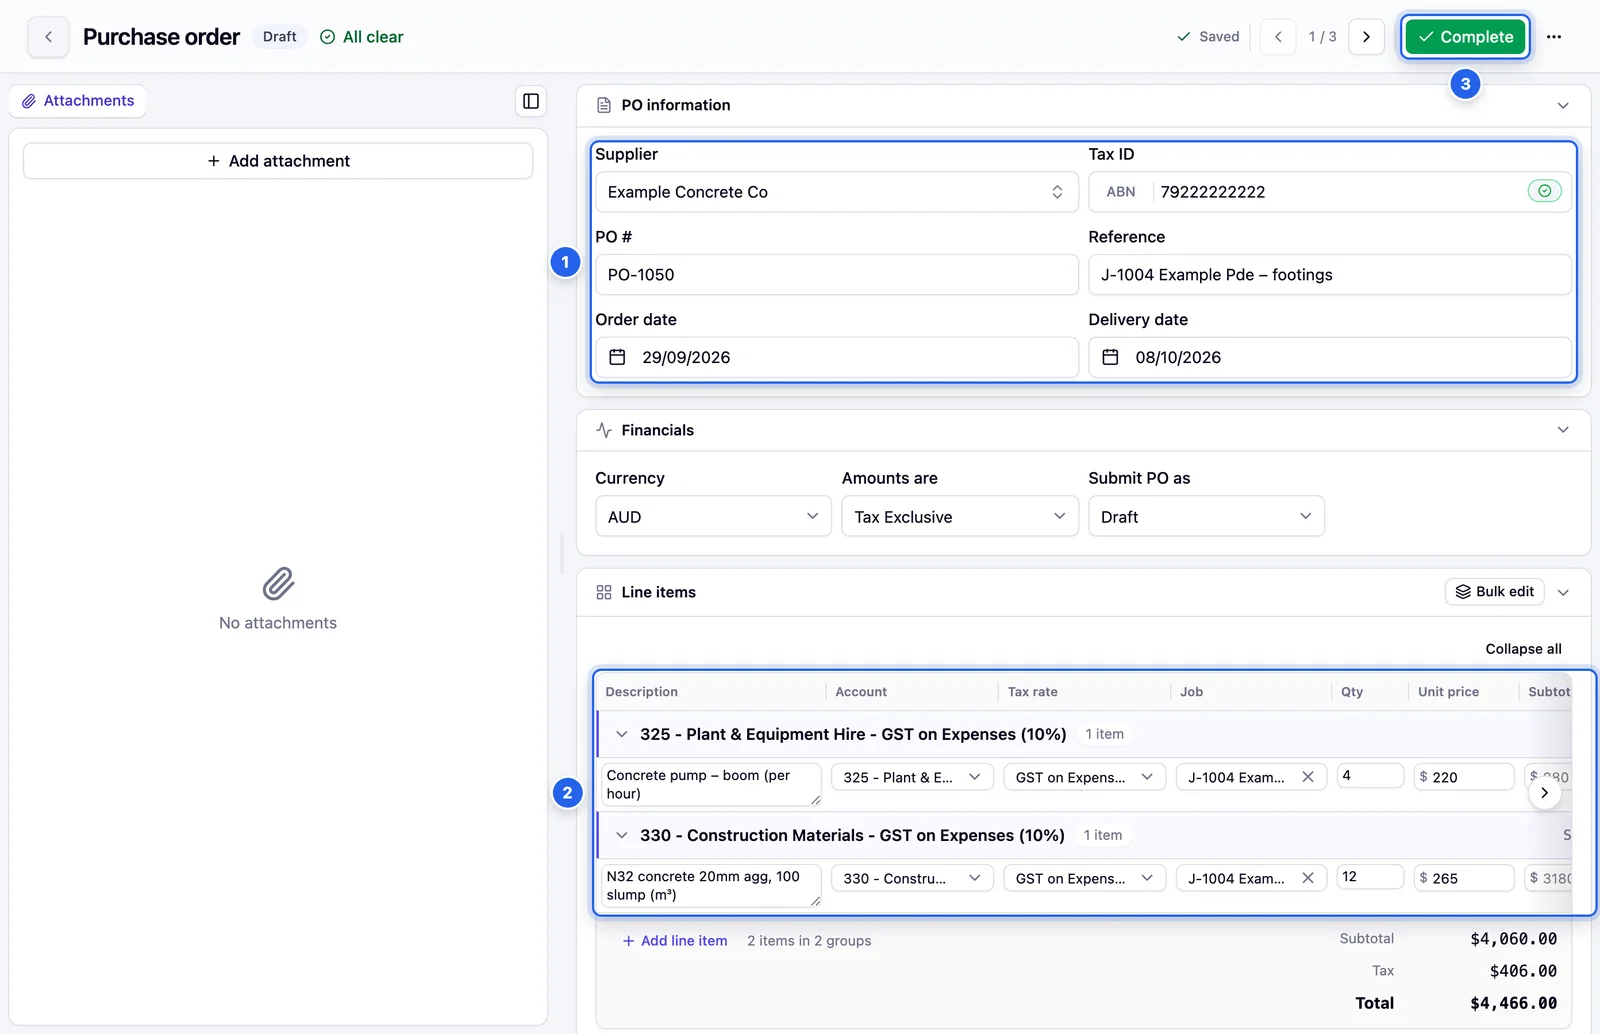
- 1 PO information: supplier, PO number, reference, order date and delivery date.
- 2 Line items, with account, tax rate and job.
- 3 Complete when the PO is ready. With approval steps it reads Send for approval.
3 Or upload a PO
If you already write POs somewhere else, upload them or forward them to your Pulsify address, the same as an invoice. With the module on, Pulsify recognises purchase orders and puts them in the PO queue.
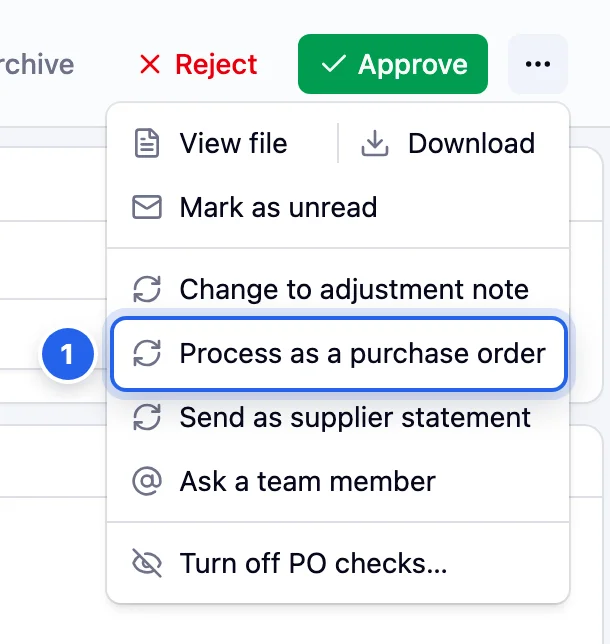
If a PO lands in your Invoices queue by mistake, open the ⋯ menu and choose Process as a purchase order. Pulsify re-reads it as a PO.
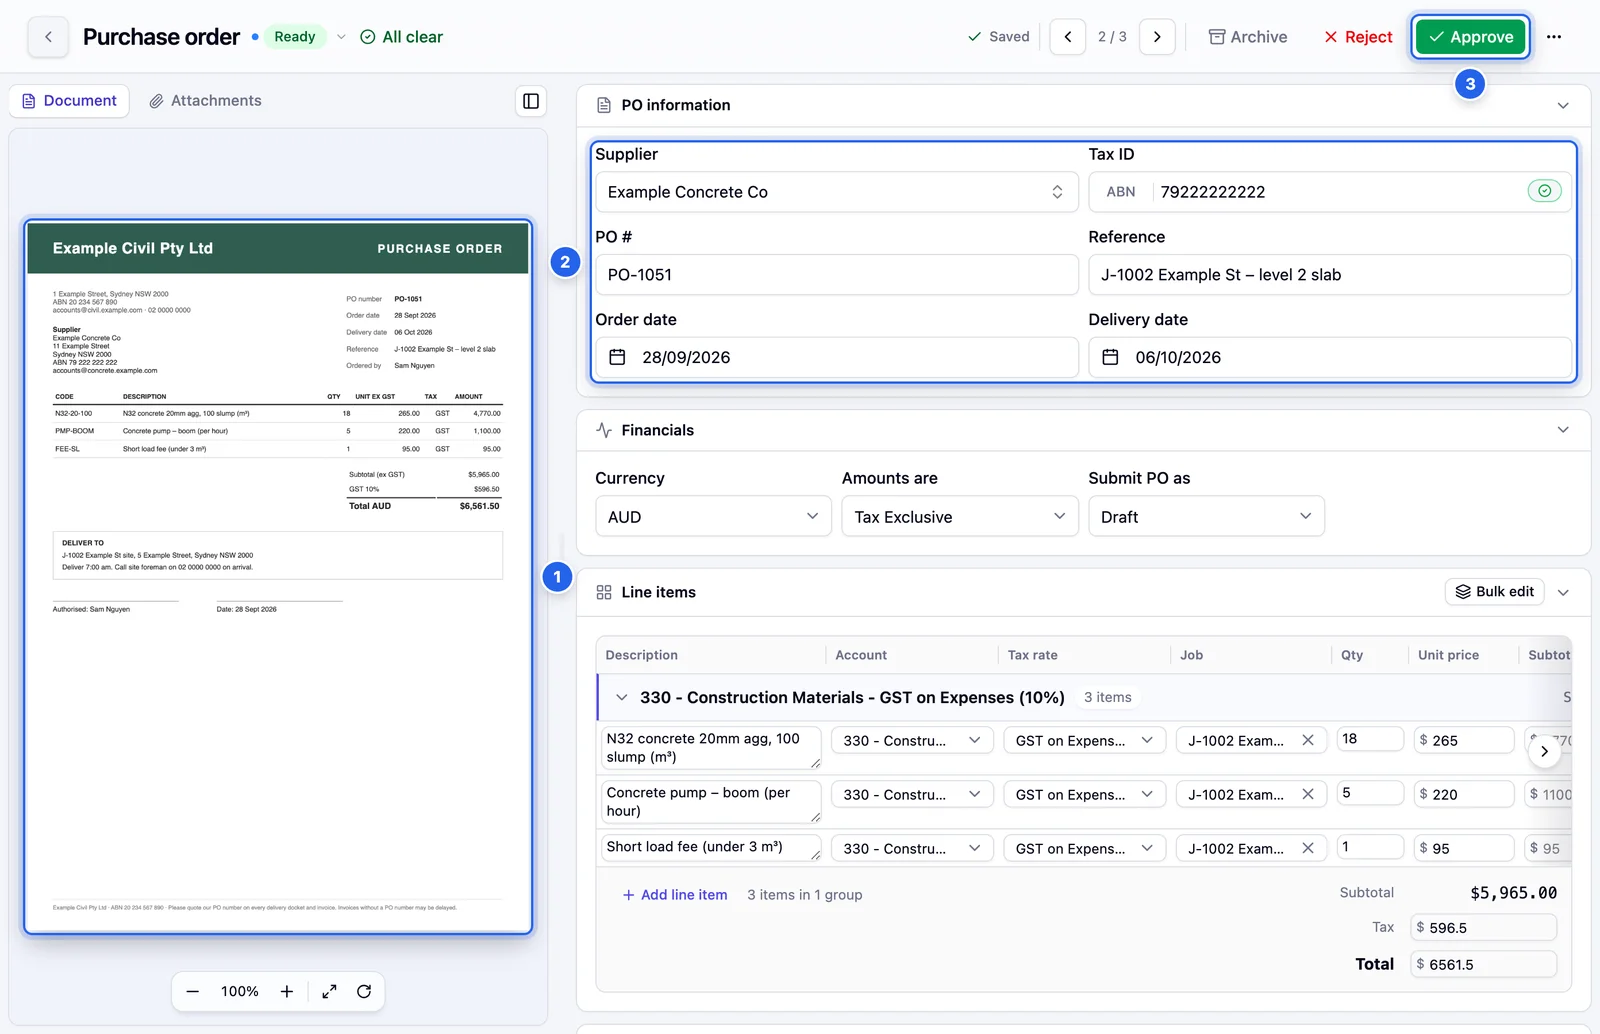
- 1 The PO you uploaded.
- 2 What Pulsify read from it. Check and correct anything that's wrong.
- 3 Approve. On the last approval step, this sends it to Xero.
4 Approve it into Xero
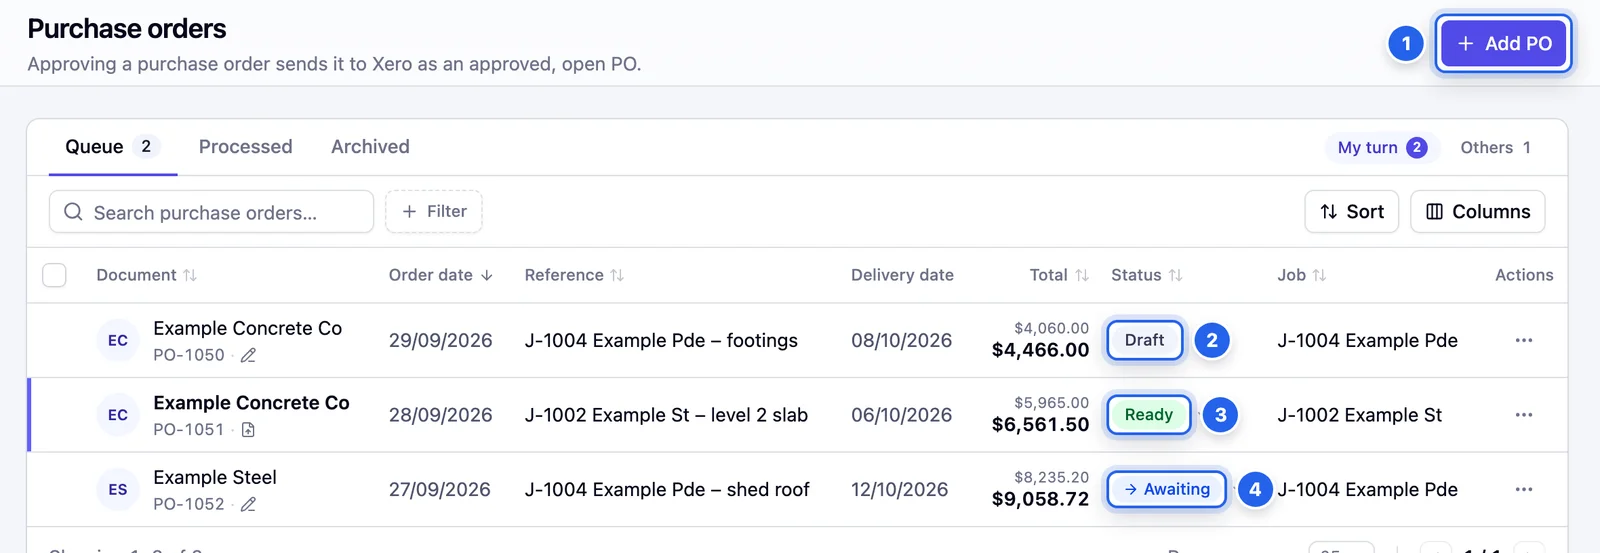
Without approval steps, open an uploaded PO and click Approve. Any Admin or Approver can do this. On a PO you started yourself, Complete does the same job. Pulsify creates it in Xero with the status picked in Submit PO as.
If your company uses approval steps for POs, the draft's button reads Send for approval. The PO then goes through the steps on the Purchase orders board, the same way an invoice does. The bar at the top shows who it's waiting on. When the last step approves it, Pulsify creates it in Xero. To set up the steps, see Set up approval workflows.
Approved POs move to the Processed tab. Once a PO is in Xero, the ⋯ menu has Open in Xero.


5 Send it to your supplier
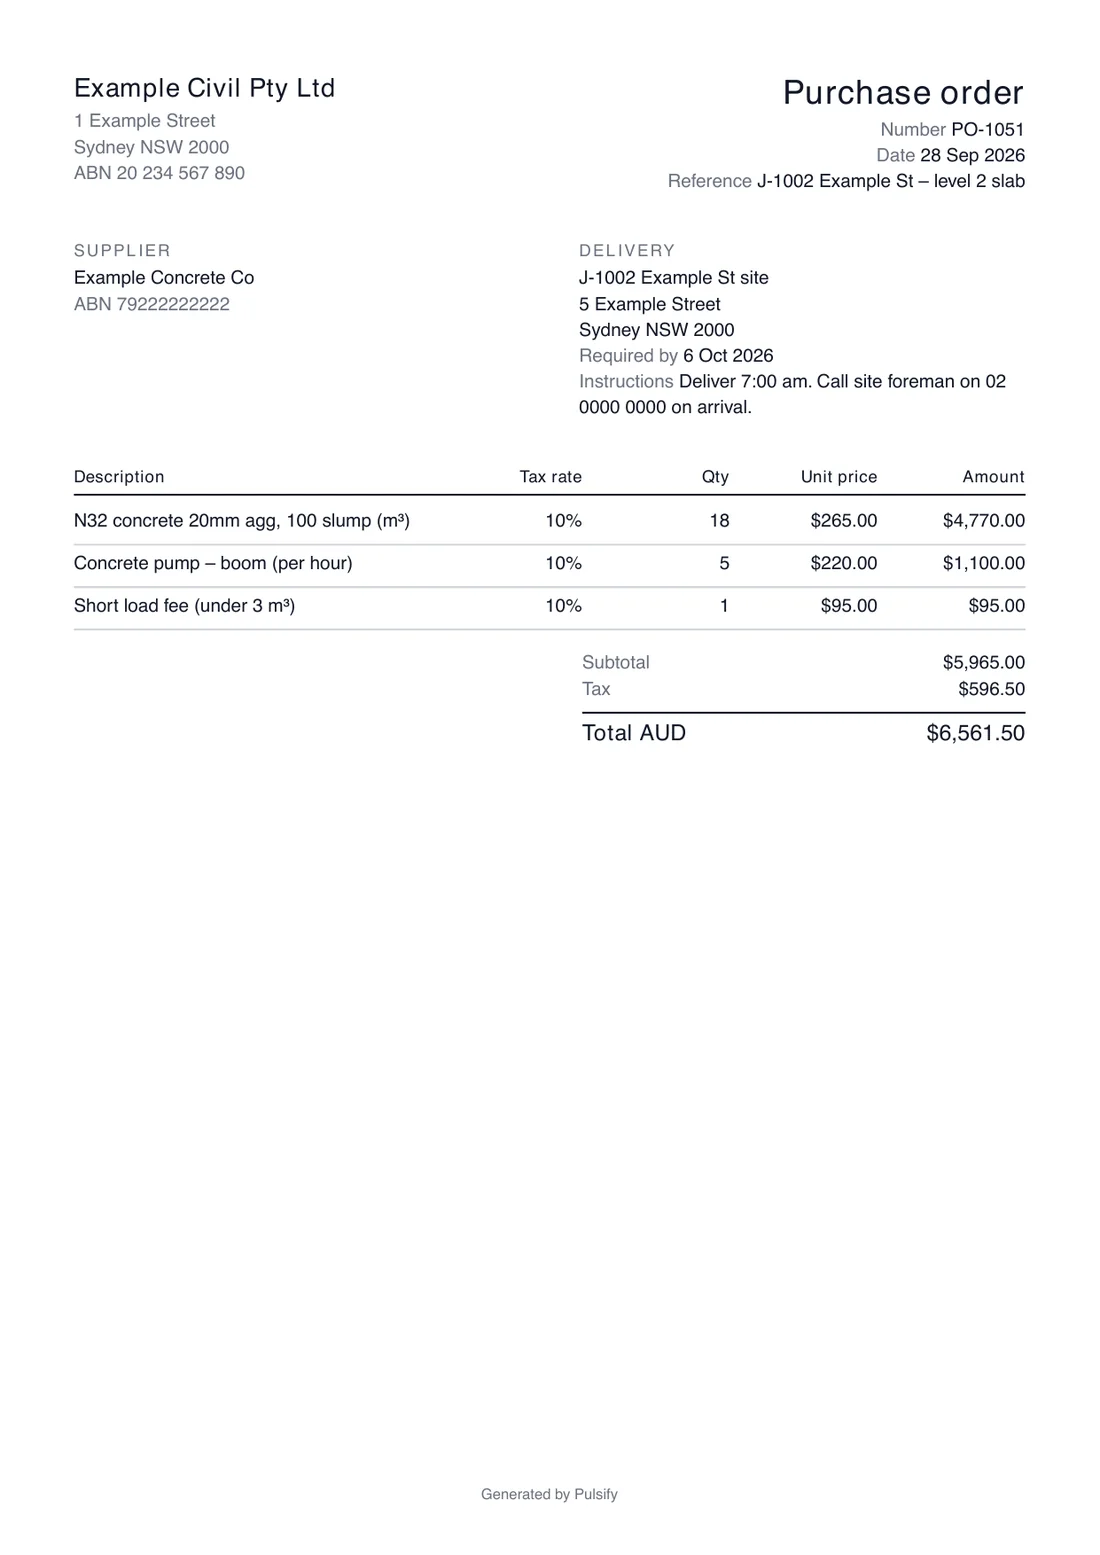
Open the ⋯ menu on the PO and choose Download PDF. Send the PDF to your supplier. If your company details aren't filled in yet, Pulsify asks an Admin for them first.
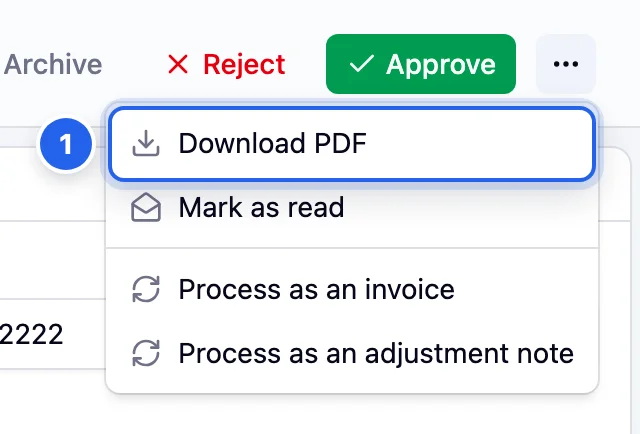
- 1 Download PDF
When the invoice arrives
When the supplier's invoice quotes the PO number, Pulsify links the two and checks the quantities and prices line by line. See Match invoices to POs.
Common questions
Do purchase orders go through approvals?
Only if you set up approval steps for them. Purchase orders have their own board on the Approvals page. Without steps, any Admin or Approver can approve a PO and it goes straight to Xero. See Set up approval workflows.
Can I use purchase orders with MYOB?
Not the PO module yet. MYOB companies can still match invoices against purchase orders that sync across from MYOB.
Who can create a PO?
Anyone in the company. A new PO is a draft only its creator can see until they send it. Turning the module on or off needs an Admin.
How do I get rid of a draft I don't need?
Open the draft and click Delete. A draft has never left Pulsify. Once deleted it is no longer available in Pulsify. Only the person who created it can delete it.
Pulsify says the PO number already exists in Xero.
Xero won't accept two POs with the same number. Change the PO number, or leave it blank and Xero will assign one.
Stuck on something?
Book a call and we'll set it up with you.